
When it comes to online food content, nothing grabs attention faster than a delicious, perfectly edited food photo. Whether you’re a restaurant owner, food blogger, or content creator, knowing how to edit food photography is essential for creating eye-catching images that attract more likes, shares, and followers. Editing food photography is about enhancing the beauty of your dishes without losing their natural charm. Let’s explore the complete process of making your food photos shine on social media.
Understanding the Importance of Food Photo Editing
Before diving into how to edit food photography, it’s important to understand why editing matters. Even the most skilled photographers rely on editing to perfect lighting, adjust colors, and sharpen details. Editing helps you bring out the true texture and flavor of the food so that viewers can almost taste it through the screen. The right edits make your images stand out in a crowded feed and help create a consistent visual style for your brand or restaurant.
Social media platforms like Instagram, Facebook, and Pinterest are all highly visual. If your photos look dull or unbalanced, they might go unnoticed. Editing allows you to correct imperfections, balance lighting, and enhance color contrast, ensuring every dish looks irresistible. Simply put, learning how to edit food photography helps you turn ordinary pictures into scroll-stopping masterpieces.

Preparing Your Images for Editing
A great edit starts with a good photo. Before you even open your editing app, make sure your image is sharp, well-lit, and properly composed. Natural light works best for food photography because it keeps colors accurate and textures crisp. Avoid harsh shadows and uneven lighting, as they can make editing more difficult later on.
Once you’ve captured your shots, transfer them to your computer or phone and organize them in folders. Keeping your files labeled will save time when you start editing multiple images for social media posts. When learning how to edit food photography, staying organized helps you maintain consistency in your editing style.
Choosing the Right Editing Tools
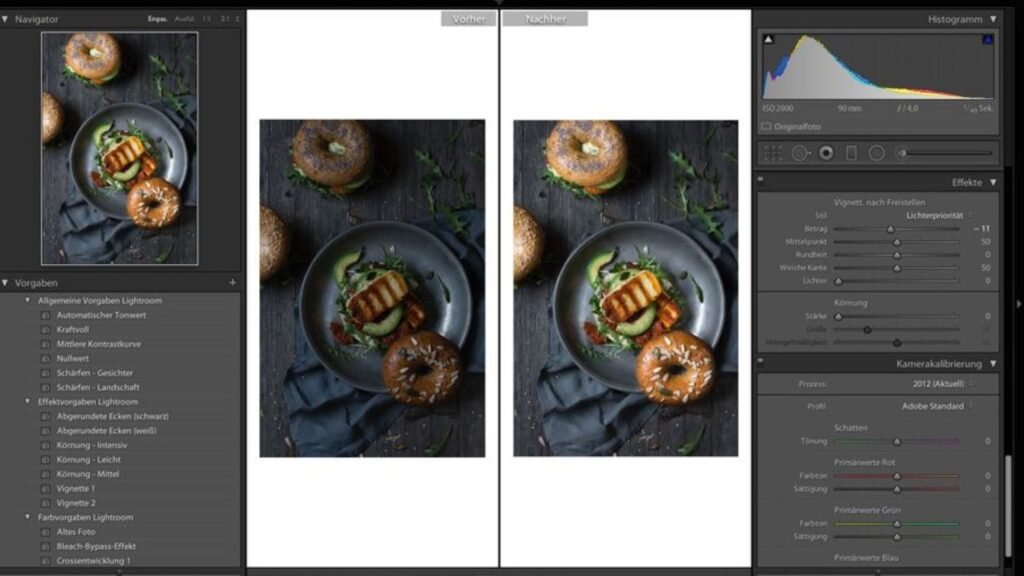
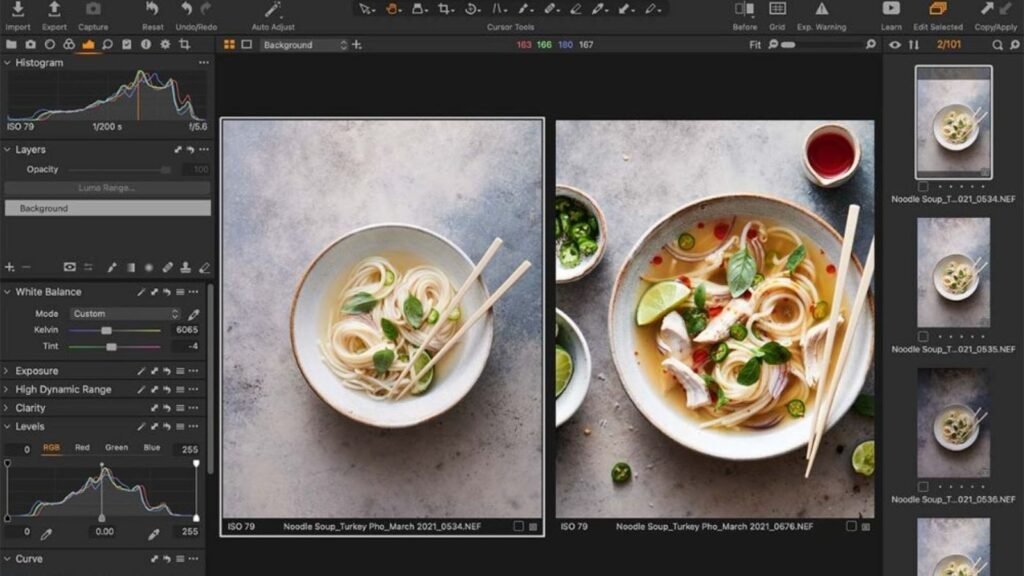
There are many editing tools available today, both free and paid. Beginners can start with easy-to-use mobile apps like Snapseed, VSCO, or Adobe Lightroom Mobile. For professional results, desktop software such as Adobe Lightroom, Photoshop, or Capture One gives you more control over every aspect of the image.
Each tool has its own strengths. Lightroom is great for adjusting color tones and lighting, while Photoshop is ideal for detailed retouching and background editing. If you’re not confident using these tools or don’t have time, you can always rely on professional editors. At aitinsider, we provide expert image editing services to make your food photos stand out perfectly on any platform.
Adjusting Exposure and Lighting
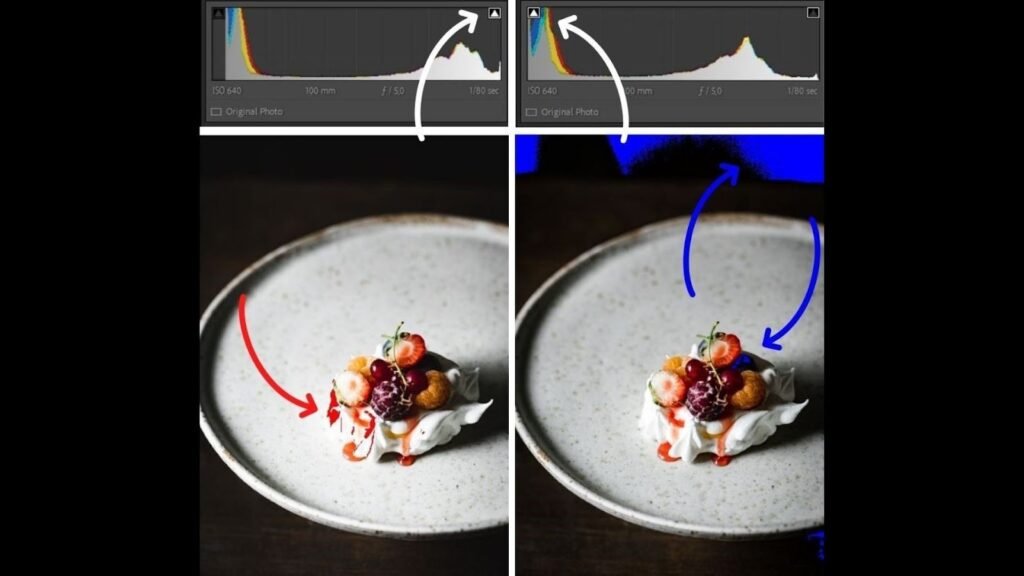
Lighting plays a huge role in food photography. Even if your original image looks well-lit, it often needs fine-tuning. Start by adjusting the exposure, which controls the overall brightness of your image. Slightly increase the exposure if your food looks too dark. But avoid overexposing, as it can wash out the colors and details.
Next, adjust the highlights and shadows. Bringing down highlights helps restore detail in bright areas like white plates or glossy sauces. Increasing shadows can recover hidden details in darker parts of the image. The contrast slider enhances the difference between light and dark areas, giving your photo more depth and realism.
When learning how to edit food photography, remember that good lighting adjustments should make the food look natural-not artificial. A subtle touch always works best.
Enhancing Colors for a Natural Look
Color correction is one of the most satisfying parts of editing. Food photos often need vibrant, natural colors to look appetizing. The white balance setting controls the temperature of your image. If your photo looks too blue or too yellow, adjust the white balance until the colors look balanced and true to life.
Saturation and vibrance sliders help intensify colors. Increasing vibrance adds richness to dull tones without oversaturating already bright colors. This keeps fruits, vegetables, and sauces looking fresh. On the other hand, be careful with the saturation slider-too much can make the food look fake.
When exploring how to edit food photography, focus on enhancing colors that complement each other. For example, warm tones like golden browns and rich reds often make food look delicious, while cool tones can make the background more soothing.
Sharpening Details and Textures
Food photography relies heavily on texture. The crisp crust of a pizza, the creamy texture of pasta, or the smooth frosting of a cake-all these details make your photos more appealing. Use the clarity, texture, and sharpening tools to enhance these elements.
Increasing clarity emphasizes mid-tone contrast, making your food appear more defined. The texture slider adds depth to surfaces like bread, chocolate, or fruit skins. However, use these tools carefully-too much sharpening can create unwanted noise and make the image look harsh.
If you’re unsure about finding the right balance, you can visit aitinsider. Our image editing experts know exactly how to bring out the best textures and details while maintaining a natural look.
Removing Distractions and Cleaning Backgrounds
No matter how carefully you set up your shot, small imperfections like crumbs, fingerprints, or background clutter can distract from the main subject. When you’re learning how to edit food photography, one essential skill is cleaning up these distractions.
In Photoshop, you can use the Spot Healing Brush or Clone Stamp tool to remove unwanted spots. In Lightroom or Snapseed, the Healing Tool does a similar job. Clean backgrounds help focus attention on the food itself, making your image more professional and visually appealing.
Another tip is to crop the image strategically. A tighter crop can eliminate unnecessary space, creating a more balanced and focused composition that fits perfectly on social media platforms like Instagram or Facebook.
Adding Depth with Selective Adjustments
Selective adjustments allow you to control specific areas of the photo without affecting the whole image. For example, if your dish is well-lit but the background looks dark, you can brighten just that area using a radial filter or brush tool. This creates a sense of depth and draws the viewer’s eye directly to the food.
This technique is especially important when you’re mastering how to edit food photography for social media. People scroll quickly, and your photo needs to capture attention instantly. Subtle selective edits make your dish stand out in the feed.
Perfecting the White Balance and Tone
White balance is one of the most overlooked yet crucial parts of how to edit food photography. When the color temperature of your image is off, it can make your food appear unappetizing. For example, a photo with a strong yellow cast may make pasta look oily, while a blue tint might make fresh produce look lifeless. Adjust the white balance until whites appear pure and colors look natural. Most editing tools have sliders for temperature and tint that let you fine-tune these tones.
Tone adjustments also help bring life into your images. Slightly adjusting the tone curve can add contrast and vibrancy. If your photo feels flat, lifting the midtones can make it pop without looking overprocessed. Remember, food should look bright and lively-not dark and heavy.
Using Filters and Presets Smartly
Filters and presets can save time, especially if you post frequently on social media. However, overusing them can make your photos look fake. When learning how to edit food photography, focus on using filters as a starting point, not the final step. Many photographers create custom presets that match their style-warm tones for cozy meals or cool tones for modern aesthetics.
If you use Lightroom, you can save your favorite settings as a preset. This helps you maintain a consistent style across your social media feed. The key is to apply filters subtly and then make manual tweaks to exposure, contrast, and saturation for each photo. Consistency is what builds a strong visual brand identity.
Retouching Food and Props
Even the best-cooked dish can have imperfections-crumbs on the plate, fingerprints on cutlery, or uneven sauces. That’s where retouching comes in. Use the healing or clone tools in Lightroom or Photoshop to clean up small flaws. Be gentle-too much retouching can make food look unnatural.
Also, pay attention to the props around your food. A smudge on a napkin or reflection on a spoon can distract viewers from your main subject. Retouching helps keep focus on the dish itself. A well-edited photo should look clean, inviting, and realistic.
If you’re short on time or not comfortable doing these edits yourself, professional services like aitinsider can help refine your food images with expert precision.
Cropping and Framing for Social Media
Different platforms require different image sizes and formats. For Instagram, a square (1:1) or vertical (4:5) crop works best. Pinterest prefers taller images, while Facebook supports horizontal layouts. When learning how to edit food photography, it’s essential to crop strategically so your dish remains the focal point regardless of platform.
Avoid cropping too tightly-leave some breathing space around the food. This helps maintain balance and gives your images a more natural look. Use the rule of thirds grid available in most editing tools to position your main subject slightly off-center for a more dynamic composition.
Adding Shadows and Highlights for Depth
Depth makes your food photos feel more realistic and three-dimensional. By adjusting shadows and highlights, you can control where the viewer’s eye goes. Increasing highlights emphasizes glossy areas like sauces or drinks, while deepening shadows adds contrast and depth.
Avoid making shadows too dark or highlights too bright, as they can distort textures. The goal is to find harmony between light and dark areas. In how to edit food photography, mastering this balance can turn a flat photo into a lively one that truly pops on social media.
Enhancing Backgrounds and Surroundings
The background plays a big role in how your food is perceived. A clean, neutral background ensures your dish stands out. Sometimes, you might want to adjust the background’s brightness, blur, or color tone during editing to make the food more prominent.
If your background feels too sharp, use a blur tool to soften it slightly. This creates a pleasant depth-of-field effect that draws attention to the dish. You can also desaturate the background slightly so the food colors become the main focus.
At aitinsider, our team specializes in background editing and replacement to help you achieve professional, magazine-worthy images.
Creating a Consistent Style for Your Brand
Every successful food photographer or brand has a unique visual style. Some prefer warm, cozy tones; others love bright, airy compositions. When you understand how to edit food photography, you can create a signature look that reflects your brand’s personality.
Consistency helps your audience recognize your content instantly. Whether you’re using Lightroom presets or manual edits, try to stick to the same tone and lighting adjustments across your posts. Over time, this builds trust and familiarity among your followers.
Exporting for Social Media
Once your photos look perfect, it’s time to export them correctly. Social media platforms often compress images, which can reduce quality. To avoid this, export at the right dimensions and file types. JPEG is best for social media, while PNG works well for transparent or high-detail shots.
Keep your file size below 2MB for faster uploads, but make sure it still retains good clarity. Also, sharpen your image slightly before exporting, as compression can soften details. When you know how to edit food photography, you’ll realize that even small export adjustments can make a big difference in how your photos appear online.
Expert Color Grading for a Professional Finish
Color grading is the secret behind professional-looking food photos. It’s the process of adding mood and emotion to your image through color harmony. When you understand how to edit food photography, you can use color grading to guide your viewer’s attention and evoke the right feeling-warm and cozy for comfort food or cool and clean for refreshing beverages.
In Lightroom, you can use the Color Grading Panel to adjust shadows, midtones, and highlights separately. For example, you can add a warm tint to highlights while keeping shadows slightly cooler for a balanced effect. Try to maintain natural tones, especially in food; you don’t want your salad greens looking neon or your coffee appearing too orange. Subtlety is key here.
Experiment with the HSL (Hue, Saturation, Luminance) panel. Adjusting individual color channels helps refine the exact shades of your ingredients. If strawberries appear too dark, increase the luminance of reds. If the greens in your herbs look dull, add a touch of saturation. Every tweak should enhance the food’s natural beauty, not overpower it.
Creative Styling and Artistic Touches
Once your basic edits are done, it’s time to add creativity. Understanding how to edit food photography isn’t just about correcting mistakes-it’s also about storytelling. Consider adding light flares, soft vignettes, or slight film grain to give your photos a unique personality. These artistic touches work especially well for social media, where originality sets your brand apart.
You can also experiment with color overlays or gradient maps to create a signature look. For instance, warm orange tones add energy to breakfast photos, while pastel tints work beautifully for desserts. Always ensure your creative effects align with your brand’s tone and audience preferences.
If you’re unsure which style fits your brand, professional editors at aitinsider can help you craft a consistent, eye-catching visual identity.
Managing Shadows, Highlights, and Contrast
The balance between shadows and highlights can make or break your photo. Too much shadow can hide details, while too many highlights can make the dish look flat. When learning how to edit food photography, focus on achieving a realistic yet dynamic balance.
Use the tone curve tool to fine-tune the light distribution. A gentle “S” curve often gives your image more contrast without losing midtone details. If your photo includes reflective surfaces like glass or metal cutlery, use selective adjustment tools to tone down harsh reflections.
Avoid over-contrasting images, especially when editing for social media. On smaller screens, overly contrasted photos can appear too harsh. The goal is to keep textures soft but still detailed, allowing viewers to appreciate every ingredient.
Maintaining Texture While Reducing Noise
Texture is what makes food photos mouth-watering. You want the crispy edges of fried chicken or the glossy surface of chocolate sauce to look real. However, sometimes increasing texture introduces noise, especially in low-light shots.
To fix this, use the noise reduction tool. Keep it low enough to maintain detail but high enough to smooth out graininess. In how to edit food photography, always zoom in to check how your edits affect textures like bread crumbs, frosting, or fruit skins. Over-editing can make food appear plastic or artificial, which reduces its appeal.
Adding Text or Branding to Food Photos
If you’re posting your food photos for marketing or social media promotion, consider adding text overlays or watermarks. This is especially useful for food bloggers, chefs, or restaurants who want to strengthen brand recognition. Tools like Canva or Photoshop let you place text neatly without overpowering the image.
When adding text, use clean fonts and keep them in corners or open spaces of the image. Avoid covering key areas of the food. Branding should enhance the photo, not distract from it. You can also include subtle logo placements or your website link-like aitinsider build visibility.
Final Quality Check Before Posting
Before uploading your food photo to social media, do a final review. Compare the edited version with the original to ensure you haven’t lost authenticity. The best food edits look natural, vibrant, and well-balanced. Check the image on both mobile and desktop screens since brightness and color can appear differently on various devices.
Ensure your image is the right size and orientation for each platform. A slightly different crop may be needed for Instagram Stories versus a Pinterest pin. When mastering how to edit food photography, paying attention to these small details makes a huge difference in engagement.

Why Professional Editing Services Matter
While editing food photos yourself is rewarding, it can be time-consuming. Not everyone has the tools, experience, or patience to perfect every image. That’s where professional photo editing services come in. At aitinsider, we specialize in enhancing food images for restaurants, cafes, and influencers. Our team focuses on lighting, color accuracy, and brand consistency to make your food look irresistible.
Whether you need retouching, color correction, or background cleanup, we’ve got you covered. We understand the art and science behind how to edit food photography for social media success. With our help, your visuals can attract more followers, customers, and engagement.
Conclusion
Editing food photos for social media is more than just adjusting brightness or color-it’s about storytelling, branding, and emotion. Mastering how to edit food photography gives you control over how your audience perceives your dishes. From exposure adjustments to color grading, every step enhances your food’s appeal and helps it stand out in crowded feeds.
If you’re ready to take your visuals to the next level, visit aitinsider today. Our professional editors can turn your ordinary food shots into extraordinary visual experiences that make your dishes truly pop online. With the right editing approach, your photos won’t just look delicious-they’ll inspire every viewer to crave what you’re serving.