Food photography is one of the most popular niches on social media today, with countless food bloggers, chefs, and home cooks sharing their culinary masterpieces with the world. But you don’t need a professional camera to capture mouthwatering shots. In fact, your iPhone is more than capable of taking beautiful food photos that look just as good as those taken with expensive equipment. Whether you’re a budding food photographer or just want to snap some better pictures of your meals, this guide on Food Photography on iPhone will give you all the tools, tips, and tricks you need to get started.
The iPhone is one of the best tools for food photography for several reasons. First and foremost, it’s always with you, making it convenient for spontaneous shots. Apple has consistently improved the iPhone’s camera features, making them highly capable for casual photographers. The advanced camera system in the iPhone-whether it’s the iPhone 13, 14, or 15-offers sharp details, true-to-life color reproduction, and great low-light performance. So if you’re looking to capture food in all its glory, Food Photography on iPhone gives you an excellent way to showcase your meals in high quality.

One of the most important elements in Food Photography on iPhone is lighting. Natural light is your best friend in food photography, especially when you’re working with an iPhone. The camera’s sensors are designed to handle natural light very well, producing vibrant, clear images that look rich and true to life.
Try to take your food photos near a window or outdoors where there is plenty of soft, diffused sunlight. If you’re indoors, avoid harsh overhead lighting or fluorescent bulbs, which can cast unflattering shadows. Instead, opt for softer, indirect light, like the kind that filters through sheer curtains. Early mornings or late afternoons are great times to shoot because the light tends to be softer and warmer.
In some cases, when natural light is unavailable, you can supplement with artificial light. Consider using a softbox or ring light to create even, flattering light for your food shots. While artificial lighting can never replace natural light, with the right setup, it can produce impressive results.
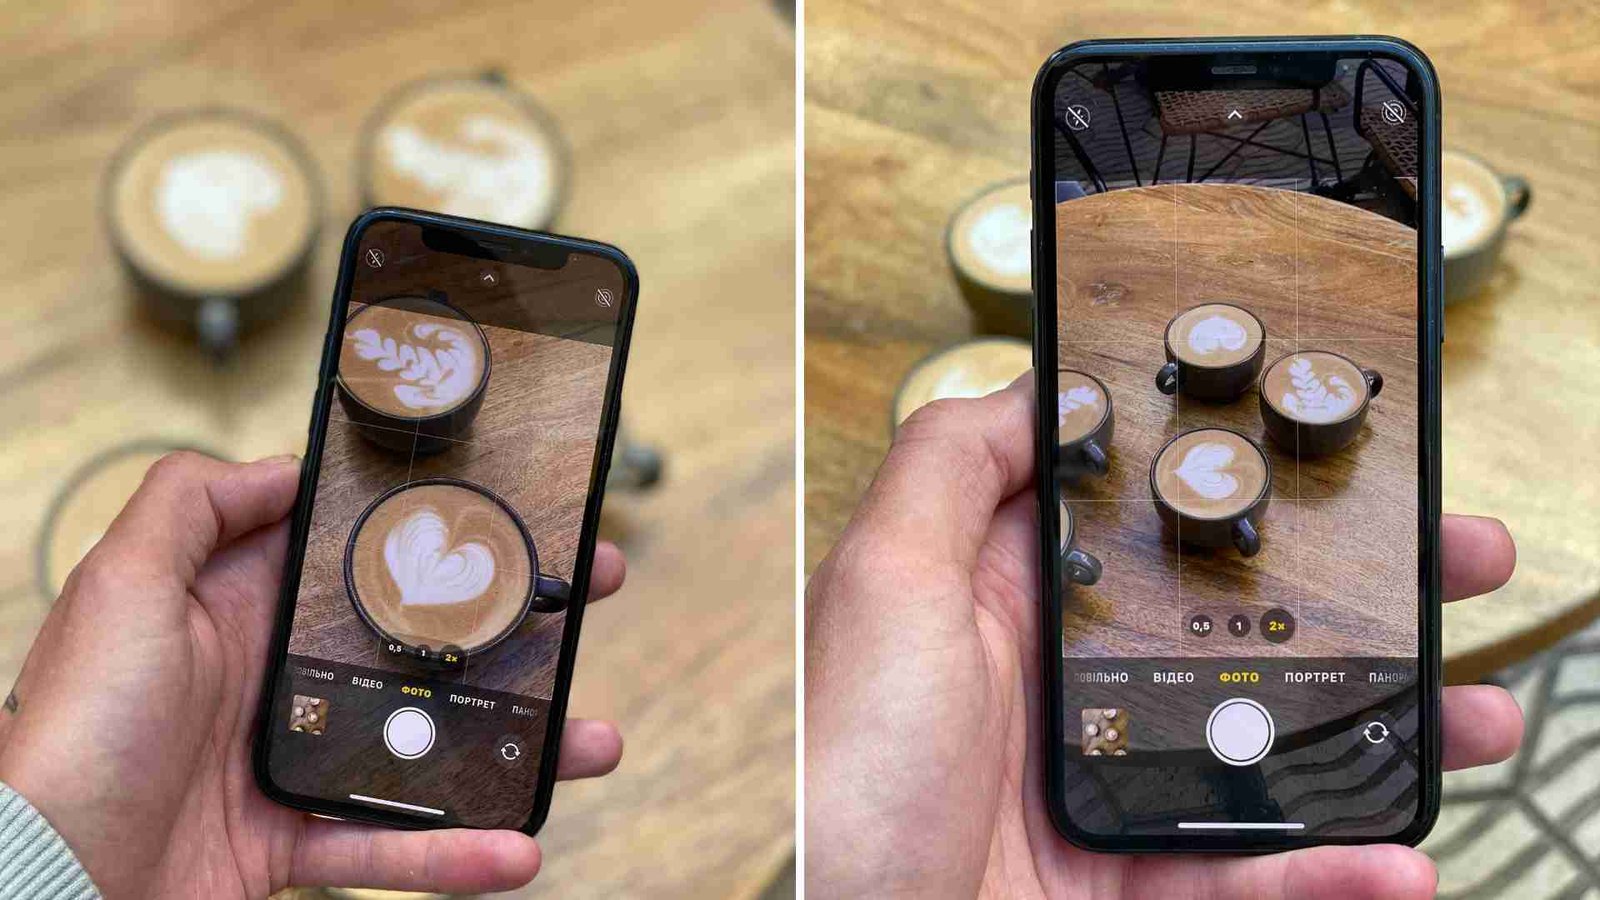
The angle from which you take your food photo can make or break the shot. With Food Photography on iPhone, there are a few angles you should experiment with to achieve the best results:
When framing your shot, remember the rule of thirds. This rule suggests dividing your frame into nine equal parts with two horizontal lines and two vertical lines, and placing the subject of your photo along these lines or at their intersections. This gives your photo balance and helps avoid a static or overly centered composition.

An essential tip in Food Photography on iPhone is to focus on the details. Food is all about textures, colors, and contrasts, and getting close to your subject allows you to capture those nuances. The iPhone’s camera has an excellent auto-focus feature, but you can also tap the screen to manually adjust focus and ensure that the part of the dish you want to highlight is sharp.
If your dish has some intricate elements, like toppings or garnishes, don’t hesitate to zoom in a little (without losing too much quality). It’s these details that give the food life and make it look more appetizing. Remember, the iPhone has a great macro lens that allows you to get closer than ever to your subject, capturing every bit of texture and detail.
After taking your shots, the next step in Food Photography on iPhone is editing. Even the best photos can benefit from a little post-processing. Fortunately, iPhones come with built-in editing tools that are easy to use and can significantly improve your photos.
In the Photos app, you can adjust the exposure, brightness, and contrast, making the colors pop and ensuring the food looks vibrant and appetizing. You can also play around with the saturation to make the food look richer or adjust the warmth to give the photo a more appealing tone.
For more advanced editing, consider downloading photo editing apps such as Lightroom, VSCO, or Snapseed. These apps offer additional features like color correction, sharpening, and the ability to create presets that you can apply to multiple photos, making editing faster and more consistent.
If you’re looking for professional-level editing, check out AitInsider’s Image Editing Service, where we can help you fine-tune your food photos, enhancing their details and bringing out the vibrant colors that make food so irresistible.
While your food should always be the main focus, adding props can elevate your Food Photography on iPhone. Props like napkins, utensils, glasses, and even small plants or herbs can add context to the scene and help tell a story. For example, a rustic wooden table can evoke a sense of comfort and warmth, while a bright, clean white plate can highlight the freshness of the ingredients.
But be careful not to overdo it. Too many props can distract from the food, which should always be the star of the shot. Stick to a few carefully selected items that complement the dish and its mood. Consider using textures and colors that either contrast or harmonize with your food, but don’t compete for attention.
Also, be mindful of negative space in the frame. Having empty areas around your dish can draw attention to the food itself and keep the viewer’s eyes focused on the main subject.

iPhones come equipped with several advanced camera features that can help you enhance your Food Photography on iPhone. Some of these features include:
Getting great food photos on your iPhone takes time, and you may not nail it on your first try. But don’t be discouraged! With practice, you’ll learn what works best for you. Experiment with different angles, lighting, and props. Play around with editing until you find a style that you love.
And most importantly, have fun with it! Food photography on iPhone can be a creative and enjoyable way to showcase your love for food and your unique perspective. With the tips and techniques outlined in this guide, you’re on your way to capturing beautiful, mouthwatering photos right from your phone.
If you want to take your food photography even further and need some help with editing, check out AitInsider’s Image Editing Service where we can give your photos that professional touch to make them stand out.
Creative Fall Food Photography For Seasonal Feasts
[…] pumpkin spice but also one of the richest color palettes for photographers. If you’re into fall food photography, this season gives you endless chances to experiment with textures, lighting, and moods that you […]
Food And Beverage Photography | Capture Delicious Moments With Style
[…] a professional photographer for your food and beverage photography can be a game-changer. But before you make that investment, it’s important to understand what to […]
Food Photography Classes | Learn To Capture Stunning Culinary Images
[…] looked at a perfectly lit food photo and wondered how to create something similar, taking the right food photography classes can be your shortcut to mastering the […]
Food Photography Online Course | Learn To Shoot Delicious Photos From Home
[…] The good news? With a little clarity on what you want and how you learn best, you can find a Food Photography Online Course that genuinely helps you grow, not just fills your bookmarks […]