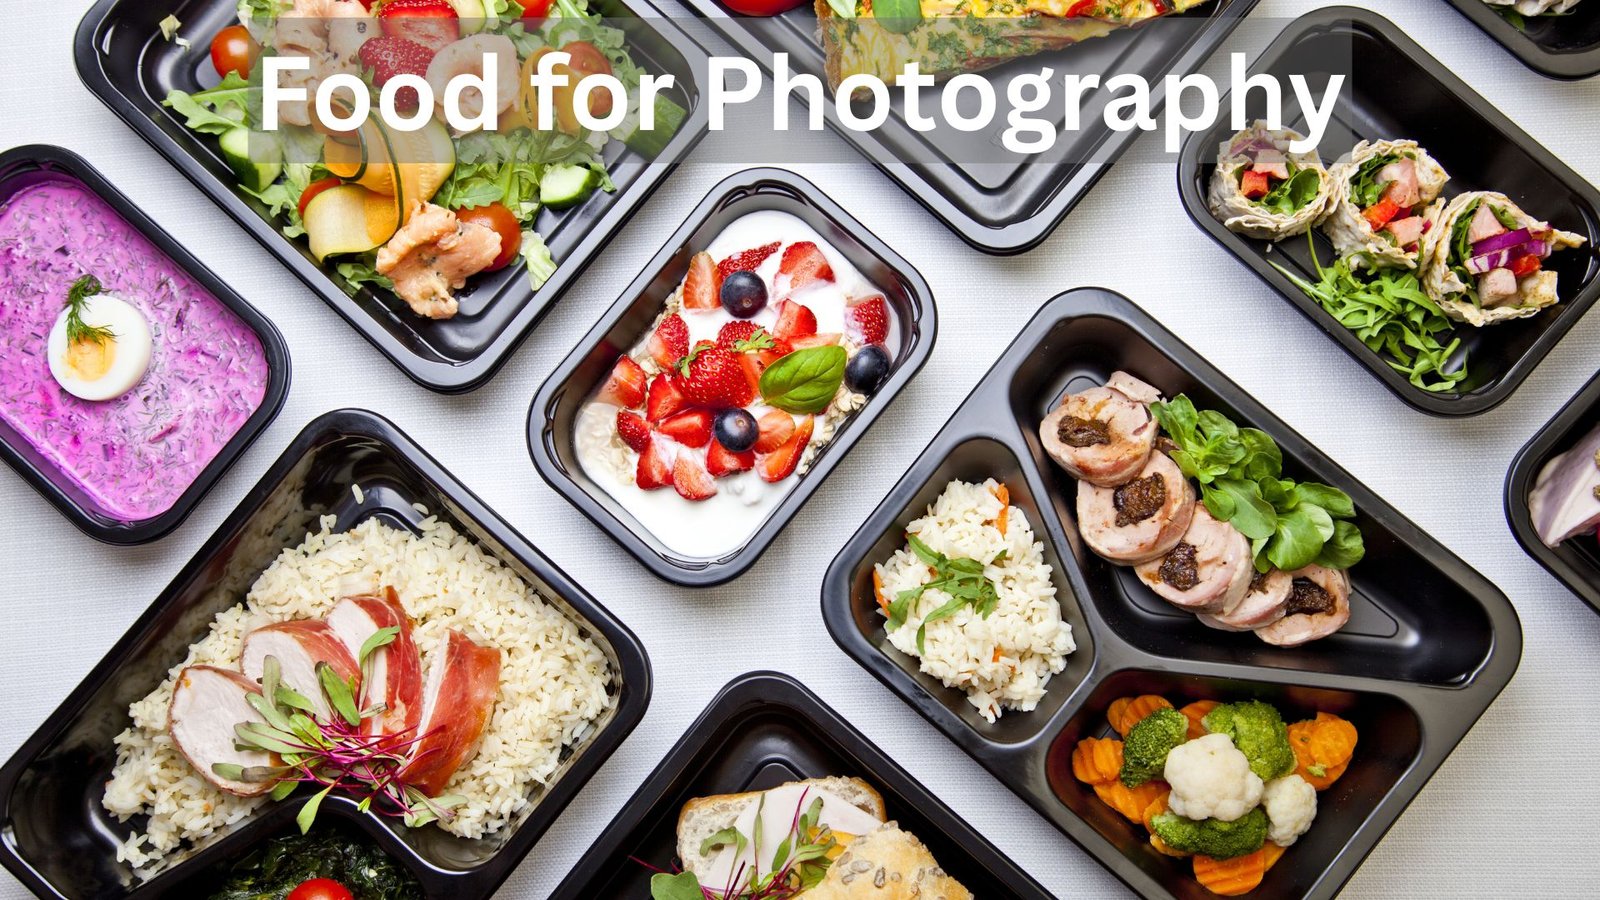
Choosing the right food for photography is both an art and a strategy. The camera sees differently than the eye, and when you’re styling a plate, you’re not just cooking -you’re creating a visual story. Whether you’re shooting for a restaurant menu, a social media campaign, or your own food blog, the secret lies in understanding how to pick, style, and present the food that shines on camera. Let’s dig into how to do that -step by step, simply and naturally.
When we talk about food for photography, we’re not talking about the perfect meal for eating but the perfect dish for showing. The textures, colors, and shapes that look great in person can fall flat under studio lights. That’s why professionals often say, “What tastes best doesn’t always shoot best.”
Think about it: a juicy burger might taste divine but collapse under heat during a long shoot. On the other hand, a salad with crisp lettuce and colorful vegetables can hold up for hours while staying photogenic. The trick is knowing the strengths and weaknesses of your ingredients.
Start by choosing food that looks alive -vibrant greens, glossy sauces, golden-brown crusts. Matte textures can look dull unless balanced with something shiny. If the dish is beige or brown, add color contrast with herbs, garnishes, or complementary props. Food for photography thrives on visual interest and balance, not just taste.
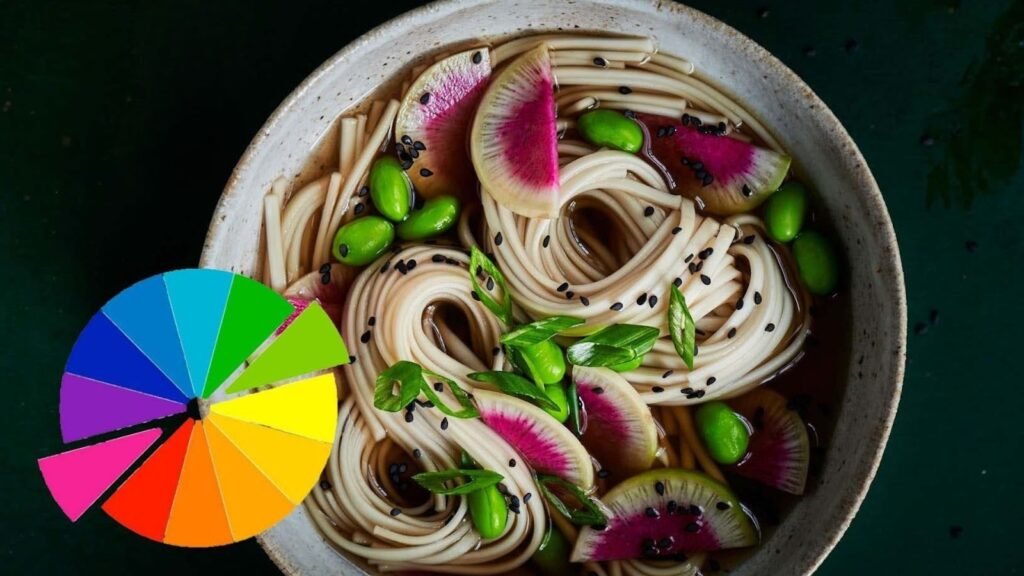
Color does more than decorate your image -it drives emotion. Warm colors like red, orange, and yellow create a sense of hunger and excitement, while cool colors like green and blue evoke calmness and freshness.
When selecting food for photography, think about the color palette you want your audience to feel. A golden croissant next to a pale blue cup of coffee can feel cozy and French-inspired. A bowl of fresh fruit in bright sunlight might speak of summer and health.
The balance of colors matters too. Avoid overcrowding your frame with too many similar tones. Instead, create contrast -dark backgrounds make light foods pop, and colorful foods shine best against neutral setups. If you’re unsure, photograph your dish with a few background options to see which tones highlight it best.
Texture gives life to still images. A flaky pie crust, a drizzle of honey, or a sprinkle of coarse salt -all add a tactile feel that makes the viewer almost taste the food. When you’re planning your food for photography, think about how the surface will read through the lens.
For example, soft foods like mashed potatoes or soups often look flat unless you add toppings or garnishes. A bit of herbs, oil, or a swirl of cream can introduce movement. Meanwhile, rough textures -like bread or fried foods -catch light differently, adding depth and realism.
A simple trick: use natural light from the side to emphasize texture. It creates shadows that define the shape and grain of your subject. Studio light can work too, but adjust it so that it doesn’t wash out the natural details.
Lighting is everything in food photography. It can turn an ordinary plate into art -or make even a perfect meal look dull. Natural light, especially soft morning or late-afternoon light, is ideal because it brings warmth and authenticity to the food.
If you’re shooting indoors, place your setup near a large window and use a diffuser (a white curtain or sheet works fine) to soften harsh sunlight. Avoid direct overhead light, as it can flatten your subject. Instead, use side lighting to create gentle shadows and depth.
When using artificial lights, choose daylight-balanced bulbs and avoid mixing light temperatures. Yellow light makes food look greasy; blue light makes it look cold. The goal is to mimic how the dish would appear in real life -fresh, appetizing, and alive.
Professional photographers also use reflectors to bounce light back onto the darker side of the plate, keeping it balanced. You can DIY this with white foam boards or even a sheet of aluminum foil. Mastering light is one of the best investments you can make when working with food for photography.
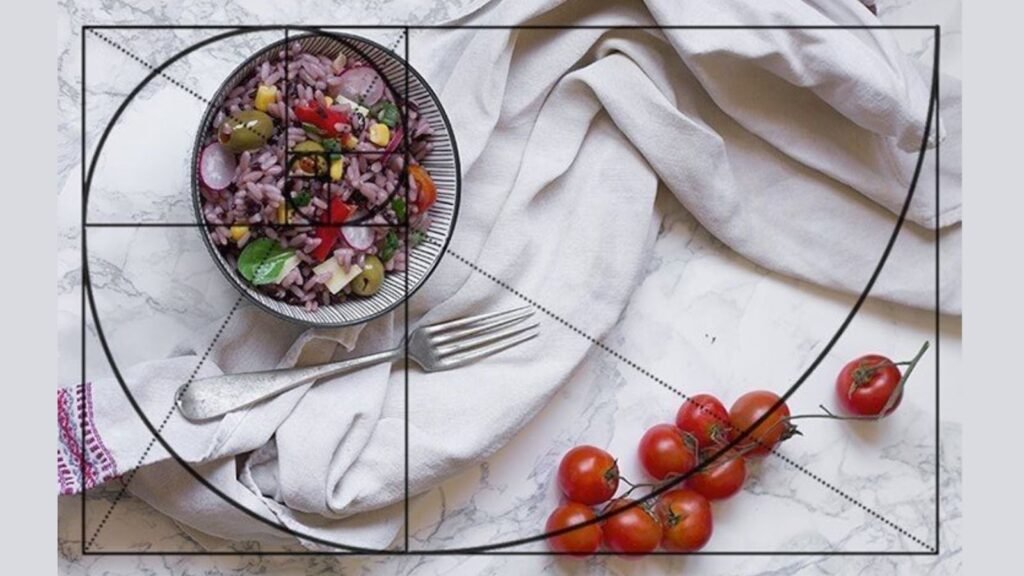
Every plate tells a story, and composition decides how that story unfolds. Think of your frame as a blank canvas -what you include and what you leave out matters equally.
For starters, follow the rule of thirds: place your main subject slightly off-center rather than right in the middle. This creates a more dynamic and natural feel. Play with leading lines -cutlery, napkins, or shadows -that guide the viewer’s eyes toward the dish.
Backgrounds and props should complement, not compete, with the food. Rustic boards, linen napkins, or ceramic dishes add personality. Just keep them subtle enough that the main focus stays on your food for photography.
If you’re shooting multiple items -say, a brunch spread -try layering elements at different heights. Use boxes or plates to create visual depth. A flat lay works great for colorful meals, while angled shots highlight height and texture.
Freshness is everything. Wilted herbs or soggy vegetables can ruin even the best composition. When choosing food for photography, always start with the freshest ingredients available.
If you’re shooting something like fruit or pastries, buy extra pieces -you’ll need backups for when the first ones lose their appeal under the lights. For liquids, like smoothies or soups, have props like ice cubes or garnishes ready to refresh the look as time passes.
Another trick used by professionals is to undercook certain foods. Slightly undercooked pasta or vegetables hold their shape better and maintain their color longer. It’s not about eating -it’s about staying visually appealing through the shoot.
Always handle food with care. Keep a small spray bottle of water or oil handy to bring back the shine on produce or meats. A brush with a touch of glycerin can mimic moisture or dew for that just-fresh look. These small touches make your food for photography feel alive and appetizing.
Styling bridges the gap between cooking and photography. Even the most delicious meal can look unappealing if styled poorly. Start by asking yourself what emotion or story the dish represents -is it cozy, luxurious, fresh, or indulgent? Let that answer shape your layout.
For example, a rustic soup might look best served in a chipped bowl on a wooden table, while a modern dessert could use clean plates and a bright backdrop. Keep the scene authentic -don’t overcrowd or overdecorate. The hero is always the food.
Props matter too, but sparingly. Neutral colors work best, allowing the food to dominate the frame. If your dish is complex, keep the setup simple. If the dish is minimal, add small props to enhance context -a folded napkin, a coffee cup, or a slice of bread.
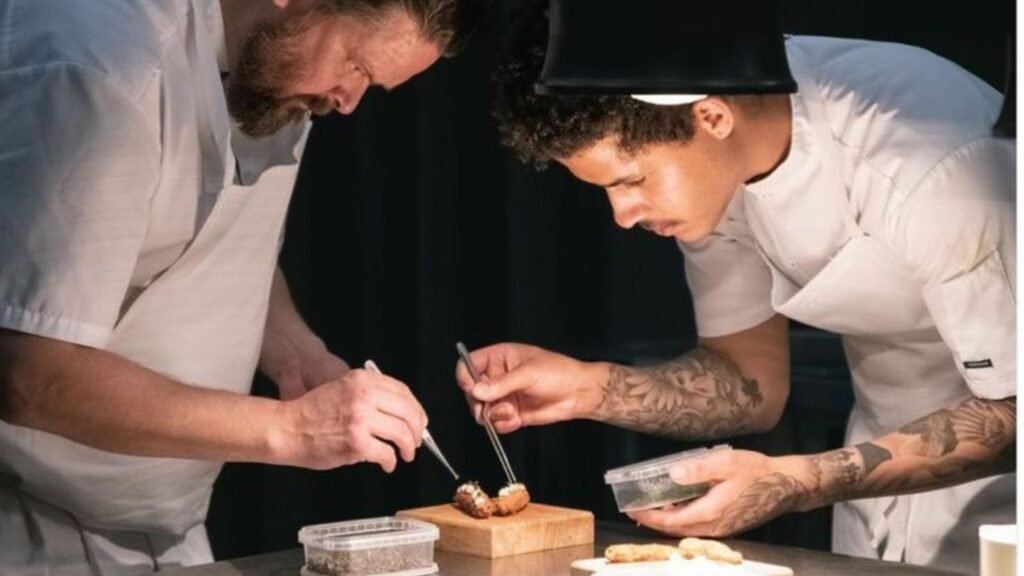
And always keep tweezers or chopsticks handy. Tiny adjustments -like moving a garnish half an inch -can change the entire composition. Styling isn’t about perfection; it’s about making your food for photography feel effortless yet inviting.
Every food group has its quirks, and understanding them can save you from frustration mid-shoot. When choosing food for photography, you’ll notice that some foods naturally behave better than others. For instance, fruits, vegetables, and baked goods tend to hold their form longer and reflect light beautifully. In contrast, hot dishes like soups or curries can quickly lose their visual appeal as steam fades and sauces congeal.
For fruits and vegetables, always wash and dry them just before shooting. A light mist of water adds freshness. If you’re photographing something like berries or greens, keep a few backups chilled so you can swap them in if they wilt.
Meat and seafood require more care. Grill marks, a glossy glaze, or a brush of oil before shooting can elevate their appearance. But remember -not everything that looks cooked tastes cooked. Many stylists use tricks like brushing soy sauce for color or using mashed potatoes to mimic ice cream because it holds shape better under hot lights.
Pastries and desserts, on the other hand, are highly photogenic but fragile. Use soft lighting and gentle handling. Fresh whipped cream or melted chocolate can melt fast, so prep your setup before adding finishing touches. When it comes to food for photography, preparation often matters more than cooking itself.
Food has a short “camera life.” The moment you plate it, the countdown begins. Knowing how to manage timing is what separates amateur photographers from professionals.
When working with food for photography, plan your entire scene before introducing the food. Set up lighting, props, and angles in advance. Once the dish is ready, you’ll have only a few minutes to capture it at its peak. For example, steaming soups look best in the first few minutes, while desserts with melting elements (like ice cream) require even faster action.
You can also prepare parts of the dish separately and assemble them only when ready to shoot. If you’re photographing a burger, for instance, cook the patty, toast the bun, and arrange the vegetables beforehand -but build the final burger right before the photo.
Patience plays a role too. Sometimes food benefits from resting a little -sauces thicken, glazes settle, or crumbs fall naturally. Letting the food “relax” on set can add realism. Timing is a dance between precision and intuition, and mastering it is essential for creating timeless food for photography shots.
Props are your supporting cast -they shouldn’t outshine the main star but should help it tell its story. The right prop can add warmth, authenticity, and depth to your food for photography, while the wrong one can clutter or distract.
Choose props that fit the dish’s identity. For homey comfort food, rustic wood, ceramic bowls, and linen napkins add coziness. For elegant fine dining, sleek plates, metallic accents, and minimal decor fit better. Backgrounds should complement the colors of the food -light for dark dishes, dark for light ones.
Natural materials always win. Wood, stone, and cloth add organic texture. Try avoiding plastic or overly shiny surfaces unless the concept demands it. You can even create your own backdrops using painted boards or fabric sheets.
Props can also subtly guide the viewer’s eye. A spoon pointing toward a slice of pie or a folded napkin leading toward a cup of coffee adds direction and balance. Remember, everything in the frame should earn its place. If it doesn’t enhance the mood, it’s just noise. Simplicity is often the strongest visual language in food photography.

Even the best photo needs a touch of editing. Post-processing isn’t about faking reality; it’s about enhancing what’s already there. Adjusting brightness, contrast, and color balance helps your food for photography look consistent and professional.
Start by correcting the white balance. Food often looks unappetizing if the color temperature is off -too blue or too yellow. Bring out natural tones while maintaining the integrity of the food. Then, enhance textures gently using clarity or sharpness tools. This brings out the flakiness of pastry or the crispness of fried items.
Avoid over-saturation. It’s tempting to make colors pop, but too much editing can make food look unnatural. The goal is to evoke appetite, not artificiality. Minor touch-ups -like removing crumbs, fingerprints, or reflections -can elevate the overall polish.
If you’re editing multiple photos from one shoot, ensure consistency in tone and lighting. This creates a cohesive look for your brand or portfolio. Many professionals trust expert editors like aitinsider, who specialize in image enhancement and retouching for commercial and editorial projects.
With the right post-production workflow, your raw images can transform into stunning, high-quality visuals that stand out in a crowded digital landscape.
Photography isn’t just about visuals -it’s about connection. Every great food image tells a story. Maybe it’s the warmth of a family meal, the excitement of street food, or the elegance of fine dining. Storytelling turns a beautiful photo into an emotional experience.
When planning food for photography, think about what you want viewers to feel. A plate of pancakes might tell a lazy Sunday morning story, while sushi might speak of craftsmanship and precision. Small contextual details -a napkin folded casually, a spilled drop of coffee, a bite taken from a cookie -make the scene feel real.
Lighting, props, and even camera angle can reinforce that story. Low, moody lighting works for intimate dinners; bright, airy tones suit casual brunches. Don’t aim for perfection every time -sometimes, a touch of mess adds character. A few crumbs or a splash can bring authenticity and movement.
Ultimately, storytelling is what makes food for photography powerful. It’s not just a visual feast -it’s an invitation to imagine the taste, the moment, and the emotion behind it.

Food photography evolves just like cuisine does. What looked trendy five years ago might feel outdated now. Staying aware of current trends helps your food for photography feel fresh and relevant.
Right now, minimalism and naturalism dominate. Photographers are embracing natural light, raw textures, and unfiltered authenticity. Gone are the days of overly polished, commercial-looking shots. Viewers now crave realness -imperfections, natural shadows, and everyday moments.
Another trend is the rise of storytelling through lifestyle settings. Instead of isolated plates, you’ll see images that include hands, ingredients, or behind-the-scenes glimpses. This approach adds warmth and relatability.
On social media, vibrant top-down shots (flat lays) still perform well, especially when combined with cohesive color palettes. But vertical compositions are gaining traction thanks to mobile-first platforms. Experimenting with angles, natural tones, and candid details can help your food for photography stay ahead of the curve.
Great food for photography doesn’t always require a studio full of expensive gear. It’s more about how you use what you have. Still, a few tools can make the process smoother and more consistent.
A good camera -whether DSLR, mirrorless, or even a high-end smartphone -is your starting point. Pair it with a quality lens that suits your style. For food, a 50mm or 100mm macro lens is ideal because it captures detail and natural perspective. A tripod is essential too -it helps you shoot steady, experiment with angles, and keep consistency between shots.
Lighting equipment also matters. Natural light is perfect when you can get it, but a softbox or LED panel gives you control indoors. Diffusers soften harsh light, and reflectors bounce it back to reduce shadows. These small accessories can dramatically elevate your food for photography results.
Keep props and backdrops organized. Having a small collection of versatile items -wooden boards, fabric napkins, ceramic dishes -means you can adapt quickly for different shoots. And never underestimate the power of small tools like tweezers, brushes, and droppers. They help you make precise adjustments without disturbing the rest of the setup.
Lastly, invest in editing software. Adobe Lightroom and Photoshop are industry standards, but there are great alternatives like Capture One or Luminar. With the right tools, you can refine every detail of your shot, from lighting to color tones, until it perfectly represents your vision.
Even skilled photographers slip up now and then. Knowing what not to do can save you time and frustration. When working with food for photography, here are some common pitfalls to steer clear of.
One major mistake is rushing. Food changes quickly, but that doesn’t mean you should. Prepare everything in advance so you’re not scrambling once the dish is plated. Another error is using harsh lighting. Direct flash flattens the image and creates unappealing reflections. Instead, use diffused light or bounce it off white surfaces for a softer effect.
Over-editing is another trap. Boosting saturation too much can make vegetables look radioactive or meats look plastic. Always aim for natural tones. Similarly, cluttering the frame with too many props can distract from the star of the show -the food. Simplicity often feels more authentic and elegant.
Finally, neglecting consistency hurts branding. If your shots vary wildly in style or lighting, your portfolio looks disjointed. Keep a visual theme that reflects your brand personality. Every frame should tell part of the same story.
Avoiding these small mistakes can instantly lift the quality of your food for photography work and make your images stand out professionally.
Not all food photos serve the same goal. The ideal food for photography depends on where and how it will be used. Shooting for a glossy magazine demands a different approach than shooting for Instagram or a restaurant menu.
For editorial photography, focus on storytelling and atmosphere. You can be more artistic, using natural light and minimal retouching. For commercial shoots, precision matters -every detail must be perfect, from the shine on the plate to the angle of the garnish.
Menu photography requires clarity. Customers want to recognize what they’ll order, so the image should be realistic, vibrant, and clean. Social media, on the other hand, rewards creativity and emotion. Behind-the-scenes shots, motion blur, or playful compositions perform better on platforms like Instagram or TikTok.
For blogs or recipe sites, step-by-step visuals are powerful. Readers appreciate seeing progression -from ingredients to the final dish. Every shot becomes part of a visual guide.
The best approach is to tailor your food for photography style to match the platform’s audience. Understand what each viewer expects, then craft visuals that meet those expectations while staying true to your brand.
Consistency is the backbone of a recognizable visual identity. When viewers see your work, they should instantly know it’s yours. Creating that signature look takes time and experimentation, but it’s one of the most rewarding parts of mastering food for photography.
Start by identifying what draws you most -bright and airy, dark and moody, rustic, minimal, or colorful. Stick to that style across your portfolio. It helps you attract clients who resonate with your aesthetic.
Use consistent editing choices too. Whether it’s warm tones or cooler shadows, keep them uniform so your gallery feels cohesive. Your props and backgrounds can also reflect your brand personality. For instance, if you often shoot organic recipes, natural textures like linen and wood work beautifully.
A personal style also grows from how you frame and light your dishes. Maybe you love close-ups that show detail or prefer wider shots that include hands and action. Keep refining what feels most natural to you. Over time, your food for photography will develop a visual rhythm that’s unmistakably yours.
Behind every great photo is often a team. Collaborating can elevate your food for photography from good to exceptional.
Working with stylists, chefs, and editors brings new perspectives. A food stylist ensures every element looks fresh and balanced, while a chef can tweak the dish for aesthetics -less sauce here, more garnish there. Editors and retouchers refine the final images so they’re crisp, consistent, and ready for publication.
If collaboration isn’t possible, you can still partner with experts remotely. Services like aitinsider specialize in professional image editing for photographers, restaurants, and brands. They can fine-tune your photos to meet high commercial standards without losing their natural charm.
Good collaboration is all about communication. Be clear about the mood, target audience, and message of the shoot. When everyone aligns, the final result speaks for itself -vivid, appetizing images that tell a story.
You can capture a near-perfect shot, but true perfection often comes in post-processing. That’s where expert editing services like aitinsider make all the difference.
At aitinsider, we understand the subtle art behind food for photography. Our editors enhance lighting, color balance, and texture while maintaining a natural look. Whether you’re shooting for a brand, a restaurant, or your personal portfolio, we help your images reach their highest potential.
We specialize in detailed retouching -removing distractions, sharpening details, and aligning tones for visual consistency. The goal isn’t to change your work but to polish it. You keep your creative identity while we handle the technical perfection.
For photographers, this means more time creating and less time behind a screen. For businesses, it means product images that convert viewers into customers. Great visuals aren’t just beautiful -they’re persuasive. And we’re here to help you make them shine.
Choosing the right food for photography is about more than just what’s on the plate -it’s about vision, balance, and story. Every texture, color, and light choice shapes how viewers experience the image. Whether you’re shooting professionally or just exploring the craft, taking time to plan, style, and edit your shots transforms ordinary food into visual art.
From understanding color theory to mastering lighting and post-processing, each step is a chance to refine your craft. Remember, perfection in food photography doesn’t mean flawlessness -it means capturing the moment when the dish feels most alive.
If you want professional editing that elevates your work without losing its soul, explore aitinsider. Our image editing services bring precision, color balance, and visual harmony to every frame. Together, we can turn your photos into images that speak for themselves -fresh, vibrant, and irresistible.