
Editing video is one of the most enjoyable parts of the creative process. It is where all the clips, sounds, and ideas come together to tell a story. If you are new to editing or simply new to Apple’s popular editing software, you might be asking yourself one big question: How Do You Edit Videos on Imovie? The good news is that iMovie is designed to be friendly, simple, and powerful enough for YouTube creators, students, business owners, and hobbyists.
In this guide, we are going to walk through everything step by step in a friendly, conversational way. We will talk about how to get started, how to import your footage, how to arrange clips, and how to add effects, music, and text. Whether you are making vlogs, tutorials, or family memories, you will find that learning How Do You Edit Videos on Imovie is easier than it looks at first. Take your time, read through the sections, and try the steps as you go. You do not need to be “technical” to follow this guide — just curious and willing to experiment.
Another common worry beginners have is feeling overwhelmed by buttons and menus. You do not need to know every feature on day one. In fact, most great edits are created using only basic tools such as trimming, splitting clips, adding music, and exporting correctly. As you read this article, you will see that How Do You Edit Videos on Imovie really comes down to a simple workflow: organize your project, arrange your clips, polish the look and sound, then share it with the world.
Getting Comfortable with iMovie
Before we dive deep into How Do You Edit Videos on Imovie, it helps to get comfortable with how iMovie is laid out. When you open the software, you will see three main areas. On the left, there is the library where your projects and media live. In the center or top area, there is the preview window where you watch your video. At the bottom, there is the timeline where the real editing happens.
Think of the timeline as your creative desk. This is where you place clips in order, shorten them, move them, and add effects. When understanding How Do You Edit Videos on Imovie, always remember that the timeline is where stories are built. Dragging and dropping clips into the timeline is usually the first hands-on step creators take.
If you are using iMovie on iPhone or iPad instead of a Mac, the layout is smaller, but the idea is the same. You still import, arrange, and export. So the method explained in this guide will help you across devices.

Starting Your First Project
To begin your journey into How Do You Edit Videos on Imovie, you first create a project. When you click “Create New,” you usually choose “Movie.” This opens a blank timeline where you can start adding video files. Many creators get stuck right at this moment, unsure what to do next, but it is simpler than it seems.
Once your project is created, give it a name so that you can recognize it later. If you are creating content for YouTube, TikTok, or your business, naming projects by topic or date keeps everything organized. A clean project setup makes the whole process of How Do You Edit Videos on Imovie smoother and less stressful.
Importing Your Video Clips
Now comes the real beginning of editing. To actually answer How Do You Edit Videos on Imovie, you need video clips in your project. Importing lets you bring footage from your camera, phone, or computer into iMovie. You can drag files directly into the project or use the “Import Media” button.
After importing, all your clips appear in the media library. From here, you can drag them down into the timeline in the order you want them to appear. This is where your story starts to form. If you recorded multiple takes or angles, do not worry — you can trim away mistakes later. The beauty of digital editing is that nothing is permanent until you export.
Understanding the Timeline
If someone asks you How Do You Edit Videos on Imovie, the simplest answer is: “You edit videos by working on the timeline.” The timeline represents time from left to right. Everything that appears earlier on the left plays first, and everything to the right plays later.
You can click and drag clips forward or backward to change when they appear. If you want one scene to come before another, you simply rearrange them. This process alone can completely change the mood and message of your video. That is why the timeline is often described as the heart of editing.
As you get more comfortable, zooming into the timeline helps you make precise cuts. Shorter segments give tighter storytelling and remove unnecessary pauses and silence.
Trimming and Cutting Clips
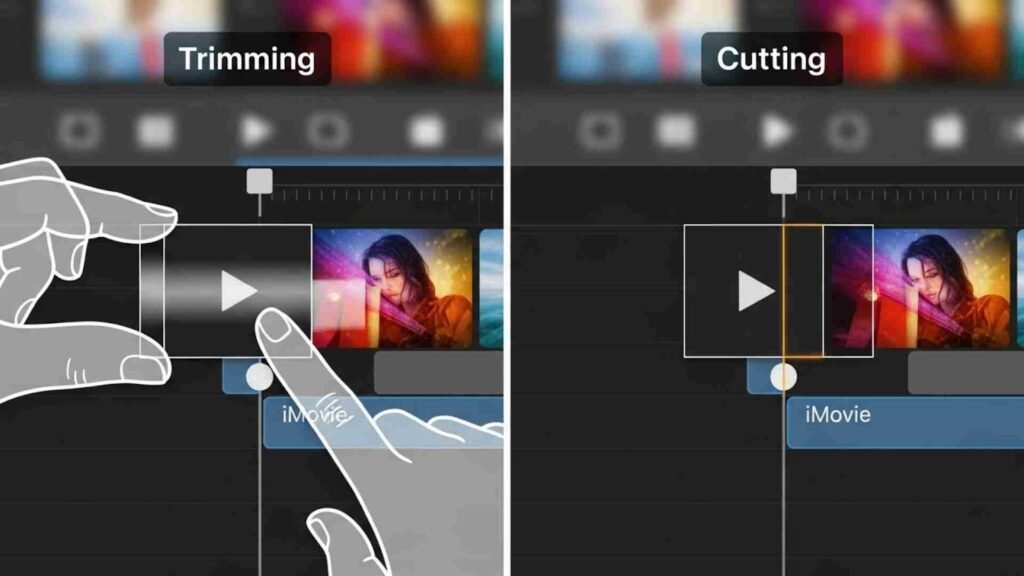
Learning How Do You Edit Videos on Imovie always includes trimming. Trimming means removing unwanted beginnings and endings of clips. For example, maybe you started recording a little early or left the camera running too long. You simply select the clip, drag its edges inward, and the extra parts disappear from playback.
Cutting, on the other hand, means splitting a clip into pieces. Maybe you want to remove a mistake in the middle of your video. You place the playhead where you want to cut, and then split the clip into two parts. You can delete the unwanted piece or move clips around.
Once you master trimming and cutting, editing suddenly feels natural. You will notice your videos becoming faster, cleaner, and more engaging. In fact, most creators say that mastering trimming is the moment they finally understand How Do You Edit Videos on Imovie in a practical, real-world way.
Adding Music and Sound Effects
A video without audio feels empty. Another important part of How Do You Edit Videos on Imovie is adding music and sound effects. You can import background music the same way you import video clips. Once added, music appears as a waveform underneath your video on the timeline.
You can lower the music volume so it doesn’t overpower your voice. You can fade it in at the beginning and fade it out at the end for a smooth, professional feel. If you are speaking in your video, balancing audio is extremely important. Clear voice plus soft music usually gives the best results.
Sound effects such as clicks, whooshes, or transition sounds can make videos more lively. Just like video clips, they can be dragged, trimmed, and moved anywhere in the timeline.
Working with Titles and Text
Creators often want to add names, chapter labels, or call-to-action messages. That is why learning How Do You Edit Videos on Imovie also includes titles and text. iMovie offers built-in title styles that you can drag onto your timeline. You simply type the words you want, change their duration, and position them where needed.
Titles can appear at the beginning as an opening introduction or in the middle to highlight key points. Many YouTubers use text to emphasize important phrases or instructions. Good text placement helps viewers follow along and makes your video feel more polished.

Transitions Between Clips
Sudden jumps between clips sometimes feel too harsh. Transitions help soften these jumps. When asking How Do You Edit Videos on Imovie, many beginners specifically want to know how to add transitions. In iMovie, transitions are found in a dedicated section and can be dragged into the space between two clips.
Common transitions include fade to black, cross-dissolve, or slide. You do not need to overuse them. Simple transitions often look more professional than flashy ones. The goal is to guide the viewer smoothly through the story, not distract them.
Adjusting Color and Lighting
Sometimes footage looks too dark, too bright, or slightly washed out. Part of understanding How Do You Edit Videos on Imovie is knowing how to correct the look of your video. iMovie has simple color and brightness controls that allow you to adjust exposure, contrast, and saturation.
Small adjustments can make a big difference. For example, adding a bit more contrast can make details stand out. Increasing saturation slightly can make colors look more alive, especially for travel or lifestyle videos. The key is to adjust gently and avoid extreme changes that make footage look unnatural.
Working with Backgrounds and Overlays
Creators often want to place one video over another, add a picture-in-picture effect, or overlay images or logos. When exploring How Do You Edit Videos on Imovie, overlays become an exciting creative tool. You can layer clips, resize them, and position them anywhere on the screen.
This is useful for tutorials, reaction videos, gaming videos, and presentations. You might place your Facecam video over a screen recording or add a logo in the corner for branding. Even though iMovie is beginner-friendly, it still gives you these powerful creative options.
Saving and Exporting Your Finished Video
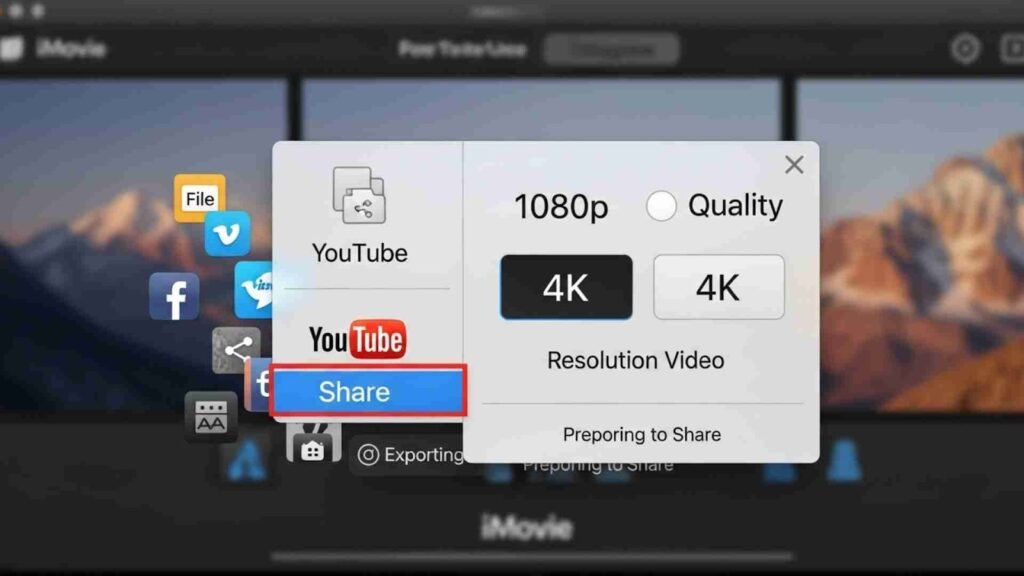
After finishing your edit, you are not truly done until you export the video. A complete answer to How Do You Edit Videos on Imovie must include exporting. Exporting means turning your project into a single finished video file that you can upload or share.
In iMovie, you usually choose “Share” and then select where the video will go — to a file, YouTube, or another platform. You can choose resolution and quality depending on your needs. Higher resolution looks better but creates larger files. For most creators, 1080p is more than enough, while some prefer 4K for premium content.
Building a Creator Mindset
Knowing the tools is only half of How Do You Edit Videos on Imovie. The other half is creativity. Editing is not just about cutting and moving clips. It is about pacing, emotion, storytelling, and guiding your viewer’s attention. As you practice, you will start asking yourself questions such as: Does this clip feel too long? Should I Zoom here? Would music make this moment stronger?
There is no single “right” way to edit. Every creator develops a unique style. Some prefer fast cuts, while others love calm, slow pacing. The more you experiment in iMovie, the more confident you become.
Advanced Editing Techniques in iMovie
Now that you understand the basics, it is time to go further into How Do You Edit Videos on Imovie using more advanced tools. These features help your videos look cleaner, more professional, and more engaging for your audience. Once you start using them, you will feel like your creativity has more space to grow.
One powerful technique is using B-roll. B-roll is extra footage that supports your main content. For example, if you are talking about traveling, your main clip may show you speaking to the camera, while B-roll shows mountains, streets, or food shots. In iMovie, you can place B-roll above your main clip on the timeline. This allows your voice to continue while the visuals change on screen. Learning to combine A-roll and B-roll smoothly is a major part of mastering How Do You Edit Videos on Imovie as a creator.
Another feature that many people love is Ken Burns effect, which slowly zooms in or out on a photo or video. This adds motion to still images and prevents them from looking static. It is especially useful for slideshows, tutorials, and storytelling content. By applying a little movement, you make images feel alive without needing complex editing skills.

Using Audio Editing for Professional Results
Good audio can make an average video feel premium. As part of learning How Do You Edit Videos on Imovie, you should understand audio tools beyond just volume control. iMovie lets you detach audio from a video clip, which means you can remove background sound and replace it with cleaner audio or a voice-over.
You can also add voice narration directly inside iMovie. This is useful when explaining steps, teaching lessons, or guiding viewers through a story. Instead of talking on camera, you can simply record your voice later and add it perfectly over your visuals. This is one of the easiest ways to make your content clearer and more polished.
Another useful feature is noise reduction. If your video was recorded in a noisy environment, iMovie offers basic tools to soften background noise. While it may not make audio perfect, it definitely makes it easier for your audience to focus on your message.
Adding Overlays, Picture-in-Picture, and Cutaways
At some point, almost every creator wonders how to show two visuals at once. To fully answer How Do You Edit Videos on Imovie, we need to include overlays such as picture-in-picture and cutaway editing. These are especially popular in reaction videos, tutorial channels, commentary videos, and gaming content.
Picture-in-picture places a smaller video window on top of another video. You can resize and move it to any corner of the frame. For example, you might show a screen recording as the main video while your webcam clip sits in a small box at the bottom corner. Cutaway clips, on the other hand, temporarily replace the main video while the sound continues. They are perfect for demonstrations, product reviews, and explanations.
These overlay tools give you strong visual storytelling power without needing complicated professional software. They are an important part of why many creators choose iMovie in the first place.
Working Faster with Keyboard Shortcuts
When people ask How Do You Edit Videos on Imovie efficiently, the answer almost always includes keyboard shortcuts. Shortcuts save time by removing the need to constantly click menus. Here are examples explained in text rather than bullet points. Pressing the spacebar plays and pauses your video quickly. Using Command + B splits a clip at the playhead, which is extremely handy for cutting mistakes. Command + Z undoes your last action, which every beginner uses often. You will also zoom in and out of the timeline with Command and plus or minus keys for more precise editing.
The more you use these shortcuts, the smoother your workflow becomes. Instead of thinking about tools, you start thinking about your story. That shift is the real sign that you are becoming comfortable with How Do You Edit Videos on Imovie as a creator.

Fixing Common Beginner Mistakes
Every new video editor makes the same mistakes, so do not worry if you recognize some of these. One common issue is leaving long pauses or awkward gaps between sentences. Trimming extra silence creates a tighter and more engaging video. Another mistake is overusing effects and transitions. It might feel exciting at first, but too many visual tricks make videos look less professional.
Some beginners also forget about audio balance. Music that is too loud makes it hard to hear your voice. To avoid this, always preview your video with headphones and adjust volumes carefully. Finally, exporting at very low quality can ruin otherwise great editing work. Make sure to export in HD or higher unless file size is a major concern.
Realizing these mistakes early helps you understand not only How Do You Edit Videos on Imovie, but also how to think like a storyteller rather than just a button-clicker.
Editing Videos for Different Platforms
You may be editing videos for YouTube, Instagram, TikTok, Facebook, or professional presentations. The platform matters because different platforms prefer different aspect ratios and styles. For YouTube, the widescreen format is common, while vertical videos work better for TikTok and Instagram Reels.
iMovie primarily edits in widescreen, but you can still prepare content for multiple platforms by framing subjects correctly and exporting with awareness of your final use. When learning How Do You Edit Videos on Imovie, always think about where your audience will watch your video. A video designed for phone viewing should be more visual and faster-paced than one meant for long-form desktop viewing.
Storytelling and Creative Flow
Editing is more than cutting clips. It is about flow, rhythm, and emotion. A big part of How Do You Edit Videos on Imovie is developing a storytelling mindset. Ask yourself what feeling you want viewers to have at each moment. Do you want excitement, calm, curiosity, or surprise?
Using pacing, music, and visuals together creates emotional impact. Quick cuts create energy. Slow fades create calm. Close-up shots feel more personal, while wide shots feel open and cinematic. Once you recognize these tools, you will notice them everywhere in movies, ads, and YouTube content.
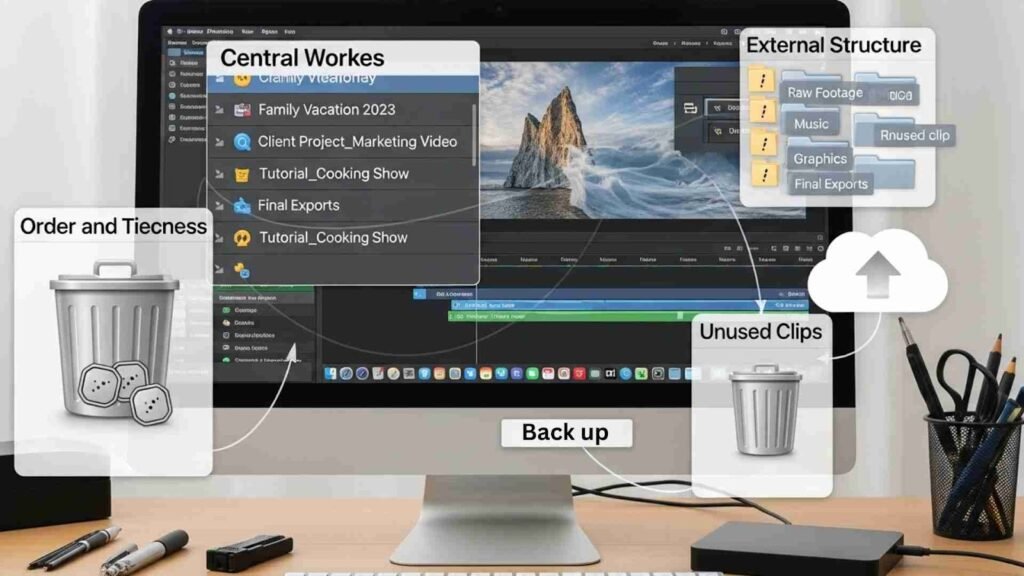
Keeping Your Projects Organized
As your editing skills grow, your number of projects will grow too. Learning How Do You Edit Videos on Imovie also means learning how to stay organized. Name your projects clearly, store media in folders, and remove unused clips from your library when you are done. A tidy workspace saves you from confusion later and prevents accidentally losing important files.
Backing up your projects is also important. External drives or cloud storage give peace of mind, especially if you are working on client or business content.
Exporting, Sharing, and Publishing Your Work
The final step of How Do You Edit Videos on Imovie is sharing your finished video with the world. After editing, choose the sharing option that fits your needs. You can save the video file to your device or publish it directly to platforms. Think about your audience, title, description, and thumbnail if you are posting on YouTube or social media.
Take pride in your finished video. Each project helps you gain confidence. Over time, your editing will become faster, cleaner, and more natural.
Final Thoughts: Your Creative Journey Starts Now
By now, the question How Do You Edit Videos on Imovie should feel much clearer. You have learned how to start a project, import clips, trim, add music, use overlays, fix mistakes, organize files, and export your final work. More importantly, you have learned that editing is not just software knowledge — it is creativity, patience, and storytelling.
Do not rush yourself. Each video you create will teach you something new. Over time, you will develop your own unique editing style and workflow. Whether you are a beginner or an aspiring professional, iMovie gives you everything you need to start creating meaningful content today.
If you are ready to move your creative journey forward, get inspired, keep practicing, and remember that help is always available. For professional image editing services that make your videos look even better, visit aitinsider and see how your visuals can reach the next level.