Welcome to the enchanting world of underwater mermaid photography! If you’ve ever scrolled through stunning images of mermaids gracefully floating in the deep blue, looking like they’ve just swum out of a fairy tale, and wondered, “How can I create that?”-then you’re in the right place. Here at aitinsider, we believe that this magical genre of photography is more accessible than you might think. It combines the art of portrait photography with the unique challenges and beauty of the underwater realm.
This guide is designed to take you from a curious beginner to a confident creator, ready to plan and execute your own breathtaking underwater mermaid photography shoot. We’ll dive deep into everything you need to know, from the essential gear and finding the perfect model to the secrets of posing and the crucial role of post-production. So, take a deep breath, and let’s begin our journey beneath the waves.
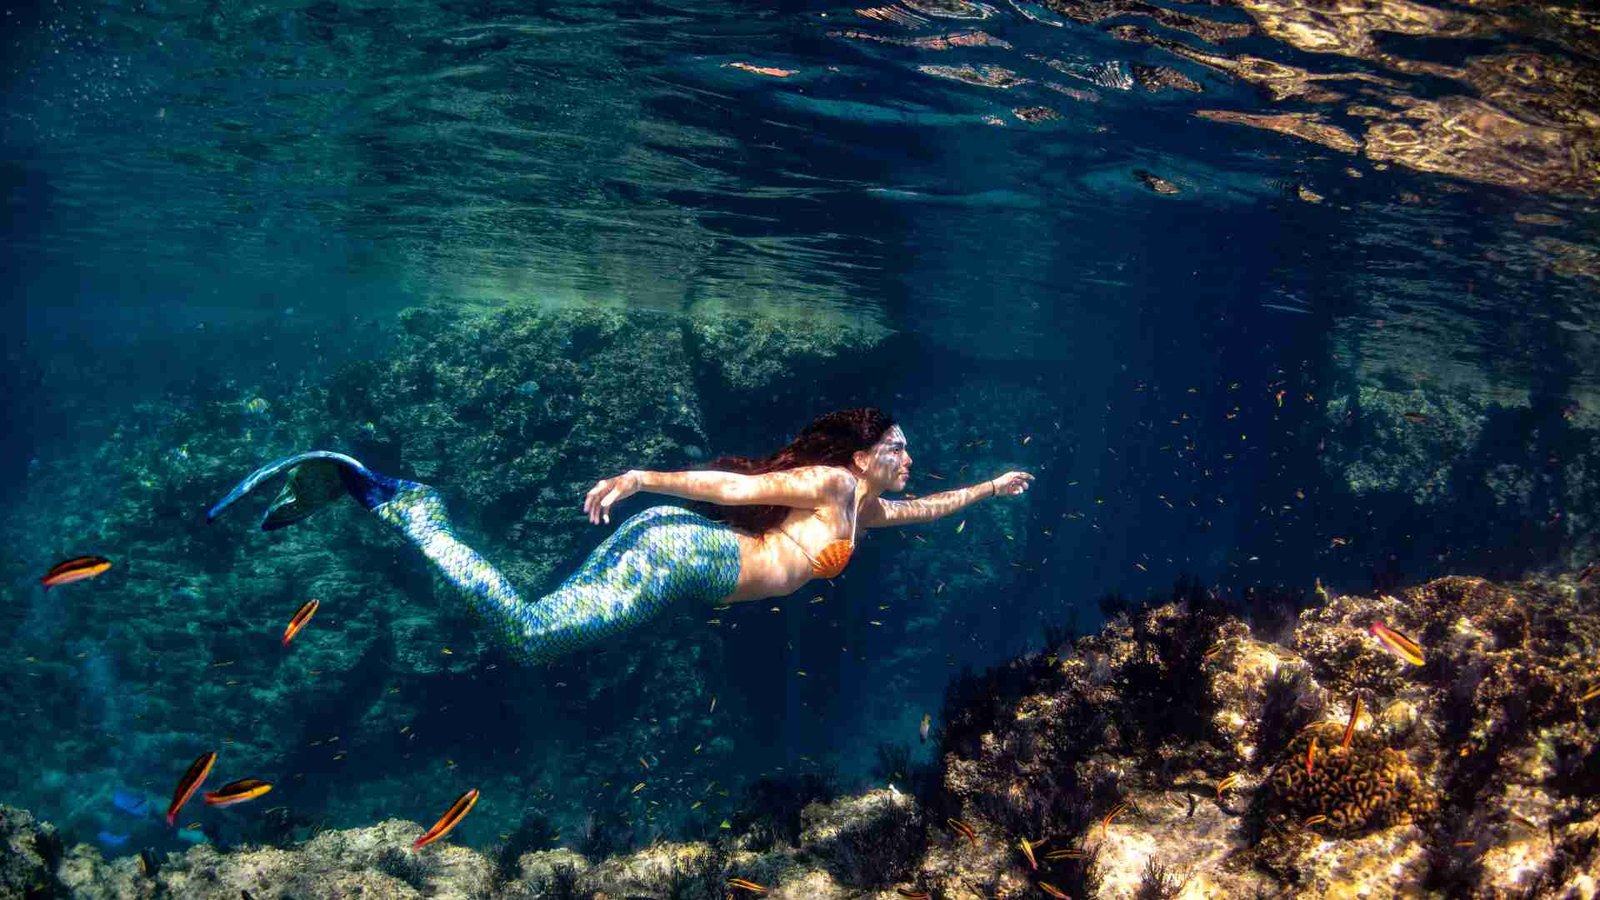
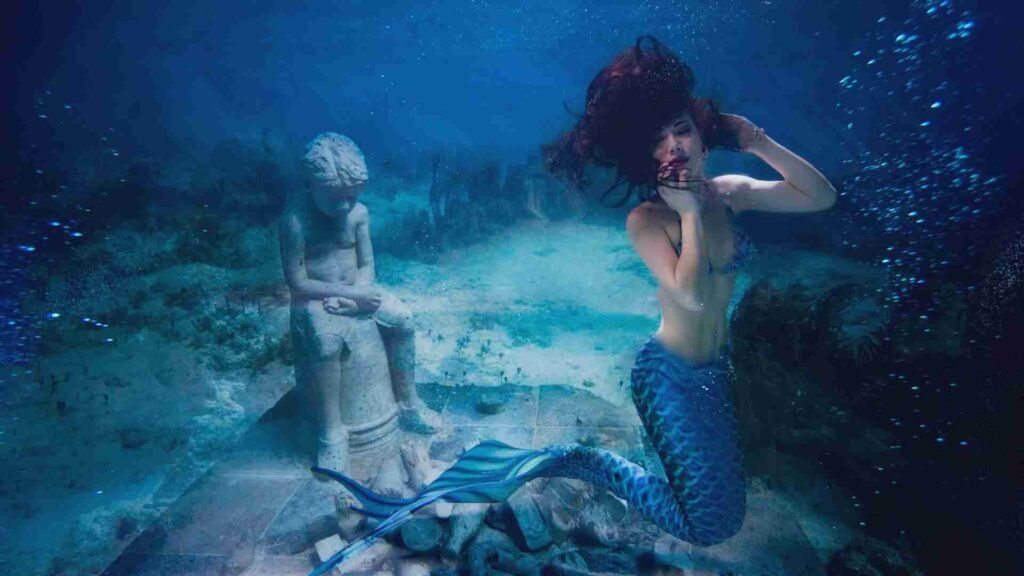
Before we get into the technical details, let’s talk about the magic. Why is underwater mermaid photography so uniquely compelling? It’s not just about taking a picture underwater; it’s about creating a narrative. You are blending fantasy with reality, using the water as both your setting and your prop. The way fabric flows, hair drifts, and light filters down from the surface creates a sense of weightlessness, mystery, and ethereal beauty that is impossible to replicate on land.
This genre pushes the boundaries of creativity. You’re not just capturing a person; you’re capturing a character-a siren of the sea, a mythical being. The challenge and the reward lie in making the impossible look real. The success of a session in underwater mermaid photography hinges on a harmonious combination of preparation, technique, and a touch of aquatic sorcery. It’s a collaborative art form that requires a team working together to bring a shared vision to life, and that process itself is an incredibly rewarding adventure.
You don’t need a Hollywood budget to get started, but you do need the right tools for the job. The core of your kit will be a camera and a way to protect it from the water.
First, the camera itself. While you can start with a high-end smartphone in a quality waterproof housing, for the most control and image quality, a mirrorless or DSLR camera is recommended. You’ll want a camera that performs well in low-light conditions, as light diminishes quickly underwater. The most critical piece of equipment, however, is the housing. This is a specialized case that is custom-built for your specific camera model, creating a watertight seal. Brands like Ikelite and Aquatech offer excellent options for various budgets. It is an absolute non-negotiable for protecting your valuable gear during any session of underwater mermaid photography.
When it comes to lenses, a wide-angle lens is your best friend. It allows you to get close to your subject while still capturing a vast expanse of the water around them, making the scene feel grand and immersive. A fisheye lens can also create stunning, dramatic effects. For closer portraits, a fast prime lens (like a 35mm or 50mm) can be beautiful, but you’ll need to be very comfortable in the water to get close enough. Lastly, don’t forget about lighting. The water acts as a filter, sucking out colors, with reds and oranges disappearing first. To bring back the vibrancy, an underwater strobe or video light is essential. This artificial light will help you reveal the true colors of the mermaid tail and the model’s skin, adding a professional polish to your underwater mermaid photography.
The model is the centerpiece of your image. In underwater mermaid photography, you’re not just working with any model; you’re working with a performer who is also a skilled swimmer and free-diver. It’s crucial to find a model who is comfortable in the water, can hold their breath safely for extended periods, and can convey emotion and grace while doing so. Safety is the number one priority, always. Never push a model beyond their limits, and always have a safety diver or lifeguard present.
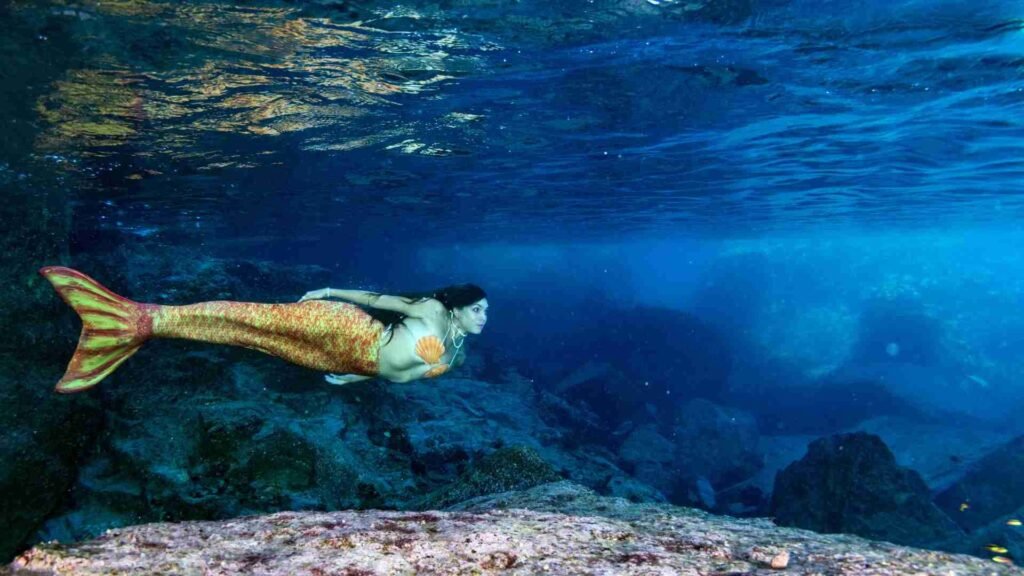
Then, there’s the tail. This is the iconic element that defines the genre. Mermaid tails range from simple, fabric “skin” tails to incredibly detailed, custom-made silicone tails that can cost thousands of dollars. For beginners, a affordable fabric tail from a reputable maker is a great starting point. They are lightweight, easier to swim in, and still look beautiful on camera. Remember that some tails, especially the more realistic silicone ones, can be very heavy and restrictive out of the water and require strong swimming skills to use safely. The choice of tail will dramatically influence the aesthetic of your underwater mermaid photography, so discuss this with your model and team during the planning stages.
The location for your underwater mermaid photography shoot will shape every other decision you make. Each environment offers different advantages and challenges.
A swimming pool is, without a doubt, the best place for beginners. It offers controlled conditions: the water is warm, clear, and calm. There are no currents, waves, or unexpected wildlife. You can focus on mastering your buoyancy, communicating with your model, and perfecting your camera settings without fighting the elements. Many pools have large windows that let in beautiful, diffused light, or you can use underwater pool lights to create dramatic effects. For your first several shoots, we highly recommend starting in a pool.
As you gain experience, you might venture into open water-the ocean or a clear lake. Open water offers an unparalleled sense of scale and a beautiful, natural backdrop. However, it comes with a host of new variables. Water visibility can change in an instant. Currents can make it difficult for you and your model to stay in position. There are also safety considerations like boat traffic, marine life, and colder temperatures. Open water shoots are for more experienced teams who are certified divers and have extensive safety protocols in place. The dream for many practitioners of underwater mermaid photography is to shoot in the crystal-clear waters of a cenote or a tropical ocean, but that is the advanced level, a goal to work towards.
An successful underwater mermaid photography session is made on dry land. Walking into a shoot without a solid plan is a recipe for frustration. The first step is to develop a concept or a mood. Are you going for a dark, siren-like aesthetic, or a bright, joyful, tropical feel? Gather inspiration from Pinterest, Instagram, and other photographers’ work to create a mood board. This board should include colors, lighting, poses, and emotions. Share this with your entire team-the model, the safety diver, and any assistants-so everyone is aligned with the creative vision.
Next, create a shot list. Underwater, communication is limited, and time is precious because your model needs to surface for air. A detailed shot list keeps you focused and efficient. Instead of just “swimming shot,” think “model swimming diagonally towards the surface, with hair flowing behind.” Being specific will save you countless breaths and moments of confusion. Also, discuss and plan the safety signals. Everyone must know the hand signals for “Okay,” “I’m going up for air,” “Are you okay?” and “Problem/Abort.” This is non-negotiable for a safe and professional approach to underwater mermaid photography.

Directing a model on land is one thing; directing them underwater is a whole new skill. You can’t give verbal instructions, so you need to be clear and concise beforehand and use simple hand signals during the shoot. Demonstrate the pose you want on the pool deck. Use a tablet or a waterproof slate to show your model images from the mood board for reference.
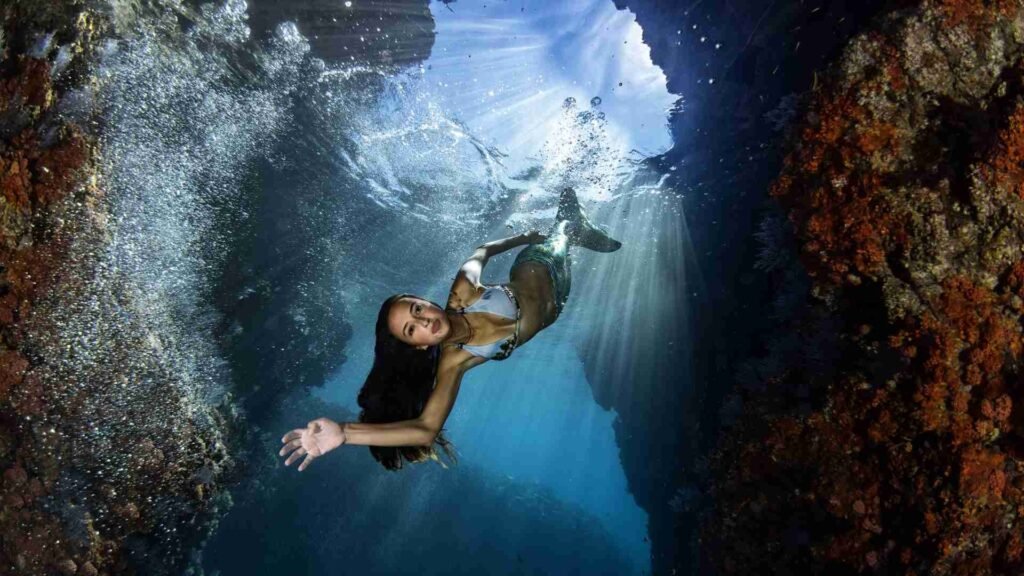
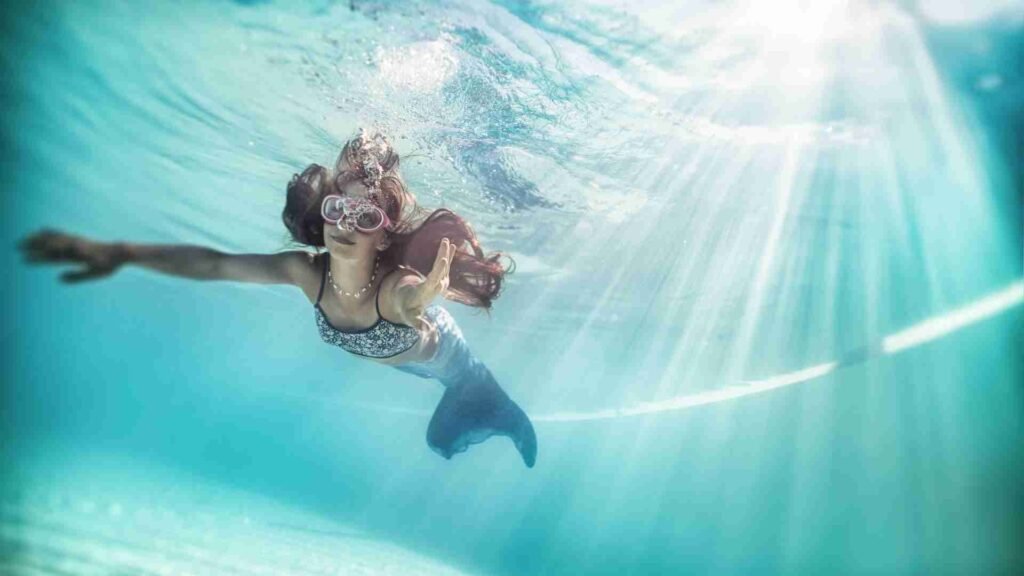
The most important thing is to encourage fluid, graceful movements. Jerky, fast motions look unnatural and stir up sediment, clouding the water. Guide your model to move slowly and deliberately. A great tip is to have them practice the “mermaid swim”-a fluid, dolphin-like kick that originates from the core, not just the knees. Remind them to be aware of their hands and fingers; relaxed, curved fingers look far more elegant than stiff, splayed ones. The goal of any session of underwater mermaid photography is to capture a sense of effortless grace, as if the model truly belongs in that environment.
This is the technical heart of underwater mermaid photography. The underwater environment plays tricks with light and color, so your standard land settings won’t work. Let’s break down the key elements:
Shutter Speed: You’ll generally want a fast shutter speed to freeze the motion of the model, the drifting hair, and the flowing fabric. A good starting point is 1/160th of a second or faster. If you want to creatively blur motion for a more dreamy effect, you can experiment with slower speeds, but this requires the model to hold incredibly still.
Aperture: This controls your depth of field. A wider aperture (like f/2.8 or f/4) will give you a beautiful, soft background blur (bokeh), making your mermaid the sharp, clear focal point. This is great for portraits. A narrower aperture (like f/8 or f/11) will keep more of the scene in focus, which is useful if you’re in open water and want to capture the stunning reef or rock formations behind your subject.
ISO: Keep this as low as possible (e.g., ISO 100 or 200) to maintain image quality and avoid graininess. You will primarily adjust your exposure using your shutter speed and aperture, and by adding artificial light with your strobes. You may need to increase the ISO in lower-light conditions, but it’s always a trade-off.
White Balance: This is crucial for color correction. Auto White Balance often fails underwater, giving you a overwhelming blue or green cast. For the most accurate colors, set a custom white balance. You can do this by using a white or gray slate underwater and following your camera’s manual custom WB process. Alternatively, if you shoot in RAW format (which you absolutely should), you can adjust the white balance with great flexibility in post-production, which is a lifesaver for perfecting the colors in your underwater mermaid photography.
Focusing: Autofocus can struggle underwater due to low contrast and particles in the water. Use a single autofocus point and place it directly on your model’s eye. The eye must be in sharp focus for the image to be successful. If you’re struggling, switching to manual focus and pre-focusing on a spot where you know the model will be can be an effective technique.
While strobes are essential for bringing back color, never underestimate the power of the sun. Natural light can create the most breathtaking and ethereal effects in your underwater mermaid photography. The most sought-after natural light phenomenon is the “sunray” or “god ray” effect, where beams of sunlight spear down through the water, illuminating particles and creating a heavenly, dramatic scene.
To capture sunrays, you need to position yourself correctly. Shoot towards the sun, with the model placed between you and the light source. The best time of day for this is midday when the sun is directly overhead, piercing the water column most effectively. You’ll need relatively clear water with some suspended particles to make the rays visible. A faster shutter speed will help define the rays, making them sharp and distinct. Combining these natural sunrays with a touch of fill-light from a strobe to illuminate your model’s face is the hallmark of a professional underwater mermaid photography image.
Backlighting is another beautiful technique. By placing the model in front of a bright surface (like the sunlit surface of the water), you can create a gorgeous silhouette, highlighting the iconic shape of the tail and the flow of the hair. Alternatively, you can use a strobe to “kick” light back onto the model’s side, creating a stunning rim-light effect that separates them from the background. Playing with the direction and quality of light is what will make your portfolio unique.
Let’s be honest: the straight-out-of-camera (SOOC) image from an underwater shoot rarely looks its best. The water has filtered out color and contrast. This is where post-production comes in-it’s not “cheating”; it’s an essential part of the underwater mermaid photography workflow. Shooting in RAW format is critical here, as it gives you the most data to work with.
Your first steps will almost always involve color correction. Using software like Adobe Lightroom or Photoshop, you’ll adjust the white balance and tint to neutralize the excessive blue or green cast. Then, you’ll work on bringing back vibrancy and saturation, particularly to the reds, oranges, and yellows that were lost. You can use adjustment brushes to selectively enhance the colors of the tail or the model’s skin.
Other common edits include removing distracting elements like safety lines, pool drains, or floating debris. You can also enhance the dreamy quality by adding a subtle glow, increasing clarity on the model to make them “pop,” and carefully sharpening the image, especially the eyes. The goal is to realize the vision you had when you created your mood board, to make the final image look the way the scene felt in your imagination.
This part of the process can be time-consuming and requires a skilled eye. If you find yourself overwhelmed or simply want to ensure your images get the professional polish they deserve, consider leveraging expert help. For instance, our team at aitinsider offers a professional Image Editing Service that can help you bring out the full magic of your underwater mermaid photography, from color correction to creative compositing.
Mastering underwater mermaid photography is a journey of continuous learning. It’s a challenging yet immensely rewarding pursuit that combines technical skill, artistic vision, and a genuine love for the water. Start simple, in a pool, with a model you trust. Focus on nailing your focus and composition before adding complex lighting or open-water elements. Your number one priority, always and forever, is the safety and comfort of everyone involved.
Remember, every professional was once a beginner who decided to take the plunge. Embrace the mistakes, learn from them, and celebrate the small victories. That first sharp, well-lit, beautifully posed shot will make all the effort worthwhile. The world beneath the surface is waiting for you to tell its stories, one magical mermaid image at a time.
We hope this guide has demystified the process and inspired you to begin your own adventure in underwater mermaid photography. For more guides, tips, and insights into the world of creative technology and photography, keep exploring aitinsider. And when you’re ready to make your images truly shine, remember that our Image Editing Service is here to help you unveil the magic hidden in your raw files. Happy shooting