Halloween is one of the most exciting times of the year, full of costumes, pumpkins, laughter, and just the right amount of spooky fun. For many families, capturing these moments through spooky Halloween photography has become a yearly tradition. But photographing kids and families during Halloween isn’t just about pointing a camera at a costume; it’s about telling a story filled with atmosphere, emotion, and creativity.
In this article from aitinsider, we’ll explore how to make spooky Halloween photography both safe and magical for everyone involved. You’ll discover tips for lighting, location, poses, editing, and how to keep the mood eerie yet family-friendly. Whether you’re a parent with a smartphone or an aspiring photographer with professional gear, you’ll find everything you need to create unforgettable Halloween memories.
Before diving into the techniques, it helps to understand what spooky Halloween photography is all about. It’s not just about making pictures look dark or scary; it’s about creating a visual story that captures the essence of Halloween. Think of foggy nights, glowing pumpkins, flickering candles, and mischievous smiles behind masks. The goal is to balance the thrill of spookiness with warmth and fun.
The best spooky Halloween photos often combine natural settings like a yard filled with fallen leaves or a quiet park at dusk with creative lighting and editing that enhances the mysterious atmosphere. You can achieve this without frightening younger children by keeping things whimsical rather than horrifying. Soft orange lights, fake cobwebs, and playful shadows can create that spooky Halloween feeling while keeping it suitable for all ages.
Timing is everything in spooky Halloween photography. The “golden hour” just before sunset provides a natural warm glow that works beautifully with orange and black tones. As the light fades, the “blue hour” that follows adds a touch of mystery perfect for spooky portraits.
For families and kids, safety always comes first. Choose locations that are easy to access, such as your backyard, a decorated front porch, or a local park. If you’re shooting at night, make sure the area is well-lit and free from hazards. Portable LED lights or small lanterns can add an atmospheric touch while helping everyone see clearly.
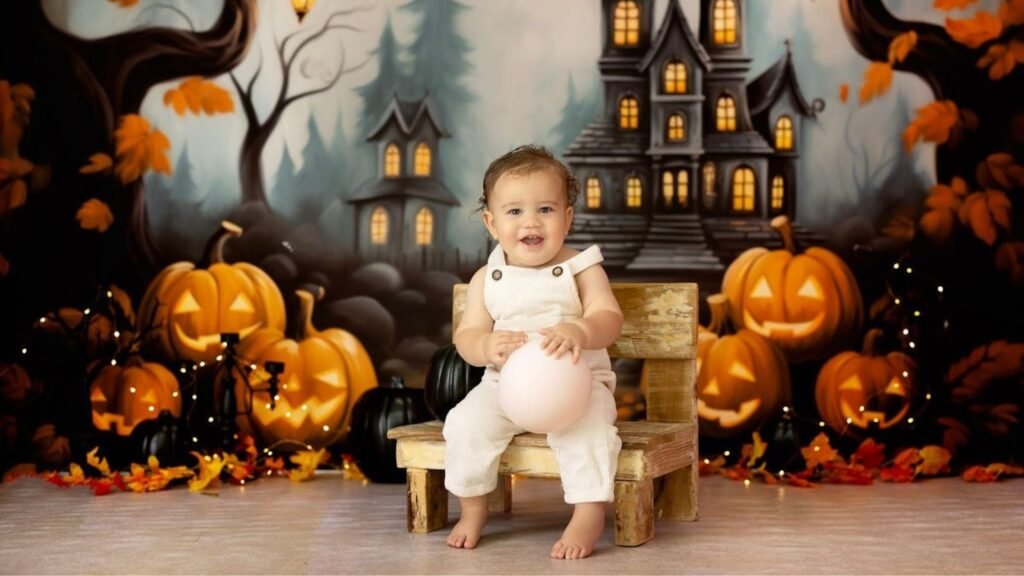
A fun idea is to set up a mini Halloween scene, think hay bales, carved pumpkins, fake tombstones, or a fog machine. This gives kids a safe space to move around and pose naturally. Let them play, laugh, and act out their favorite spooky characters; candid moments often become the most cherished photographs.
Lighting is one of the most important parts of spooky Halloween photography. While natural light is great during the day, artificial light helps create that signature eerie atmosphere once the sun goes down.
Avoid using the harsh built-in flash on your camera or phone, as it can flatten the image and create unwanted shadows. Instead, experiment with string lights, colored bulbs (orange, purple, or green), or even candlelight as long as safety precautions are followed. For families with young kids, battery-operated candles are a safer alternative that still provides that haunting glow.
Try positioning lights behind or below your subjects to create a sense of depth and mystery. For example, a pumpkin glowing from within can add a natural light source, while a flashlight under a chin can give that classic “spooky story” look. Just make sure everyone’s comfortable and having fun.
One of the joys of spooky Halloween photography is the chance to capture creative costumes. Encourage families to coordinate their outfits for a unified theme, maybe a group of friendly ghosts, classic monsters, or even movie-inspired characters.
Make sure kids’ costumes are comfortable and safe to move around in. Avoid long trailing fabrics or masks that block vision. Sometimes, simpler costumes photograph better because they let the focus stay on facial expressions and atmosphere.
Props can make a huge difference, too. Things like fake potions, toy brooms, or small pumpkins add storytelling elements to your photos. Encourage the kids to interact with their props naturally; the less “posed” they feel, the more authentic the results will be.
Getting kids to pose for spooky Halloween photography can be tricky, but the key is to make it fun. Instead of forcing smiles or stiff poses, turn it into a game. Ask them to act out a tiny story, maybe they’re ghosts sneaking through a haunted garden or witches casting a funny spell.
These little prompts help create genuine expressions, and those spontaneous giggles or wide-eyed stares will look amazing on camera. Remember, spooky doesn’t always mean serious. A mix of laughter and eeriness gives your photos more depth.
Another tip: focus on the eyes. They tell the story better than any prop. Whether glowing with excitement or pretending to look scared, kids’ eyes bring the photo to life.
If you’re using a DSLR or mirrorless camera, switch to manual or semi-manual mode to get more control over your shots. For spooky Halloween photography, use a lower aperture (like f/2.8 or f/3.5) to create a blurred background and make your subject pop. A slower shutter speed can help capture light trails from sparklers or glowing decorations.
For smartphones, use the night mode feature or download a photography app that allows manual adjustments. Stabilize your phone on a tripod or a steady surface to avoid blur. Many modern phones have impressive low-light capabilities, so don’t underestimate what you can achieve with a few lighting tweaks.

Once you’ve captured your shots, it’s time to polish them with a little editing magic. Editing is where your spooky Halloween photography truly comes to life.
Adjust brightness, contrast, and shadows to highlight details. Playing with color balance, adding a touch of cool blue or deep orange, can intensify the Halloween mood. Tools like Adobe Lightroom, Snapseed, or even your phone’s default editor can do wonders.
For a professional touch, you can enhance the images through specialized image editing services like those offered at aitinsider. Our team helps photographers and families refine their Halloween photos, adding depth, adjusting lighting, and even removing distractions, all while keeping the natural look intact.
Editing can also help ensure your spooky elements look safe and fun rather than overly dark or frightening. The right color tones and contrast balance can make a scene appear mystical without scaring younger viewers.
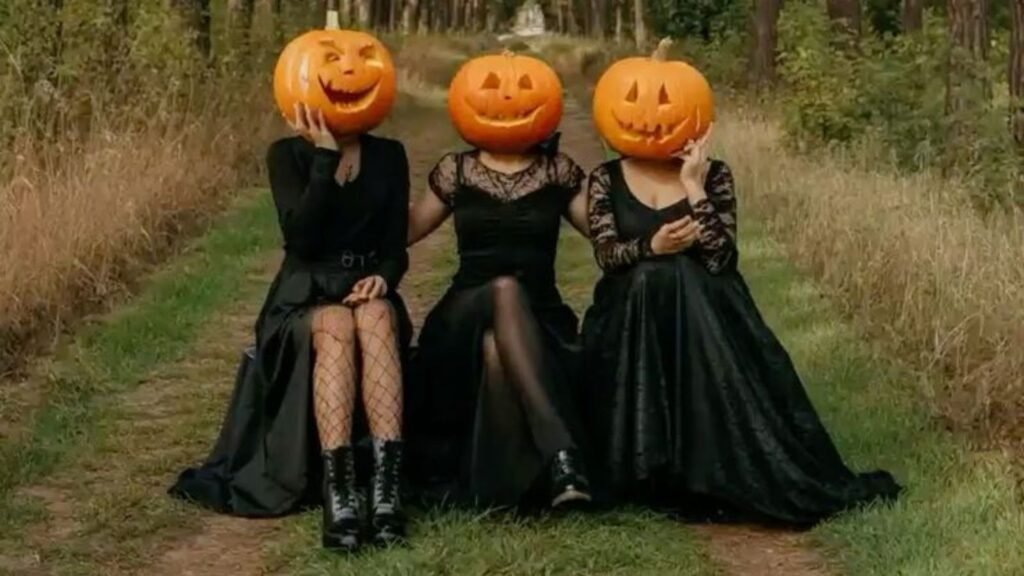
The best spooky Halloween photography tells a story. Whether it’s a group of kids exploring a haunted pumpkin patch or a family posing as friendly ghosts, a story gives your images purpose and emotion.
Start by brainstorming a simple theme before your photo session. Maybe you want a “mystical forest adventure,” a “classic monster family,” or a “witches’ tea party.” Once you have a theme, build your setting around it, think about props, lighting, and the small details that will make your story come alive.
For example, if your theme is “lost in the fog,” you can use dry ice or a portable fog machine to create atmosphere. If it’s “trick-or-treat night,” decorate a front porch with pumpkins and lanterns. A story-driven setup helps children engage naturally; they’ll feel like they’re acting in a movie rather than just posing for photos.
Encourage motion, too; walking, twirling, jumping, or pretending to sneak around adds dynamic energy. These little movements turn an ordinary photo into a moment that feels real and alive.
Halloween often comes with cooler weather and dramatic skies, which are perfect for spooky Halloween photography. Don’t fight nature; use it to your advantage. Overcast days add a soft, diffused light that enhances eerie tones. A little wind can create beautiful motion in costumes or hair. Even fallen leaves can become part of your composition, adding texture and warmth to balance the spooky atmosphere.
You can also use reflections creatively. Puddles after rain can double your subjects or catch the glow of lights in a hauntingly beautiful way. Nature’s imperfections, fog, mist, and shadows are gifts for photographers during Halloween.
If you’re shooting in the evening, try capturing the glow of streetlights or jack-o’-lanterns against the twilight sky. These small light sources can make your subjects appear part of the environment rather than separate from it, giving your spooky Halloween photography a cinematic touch.
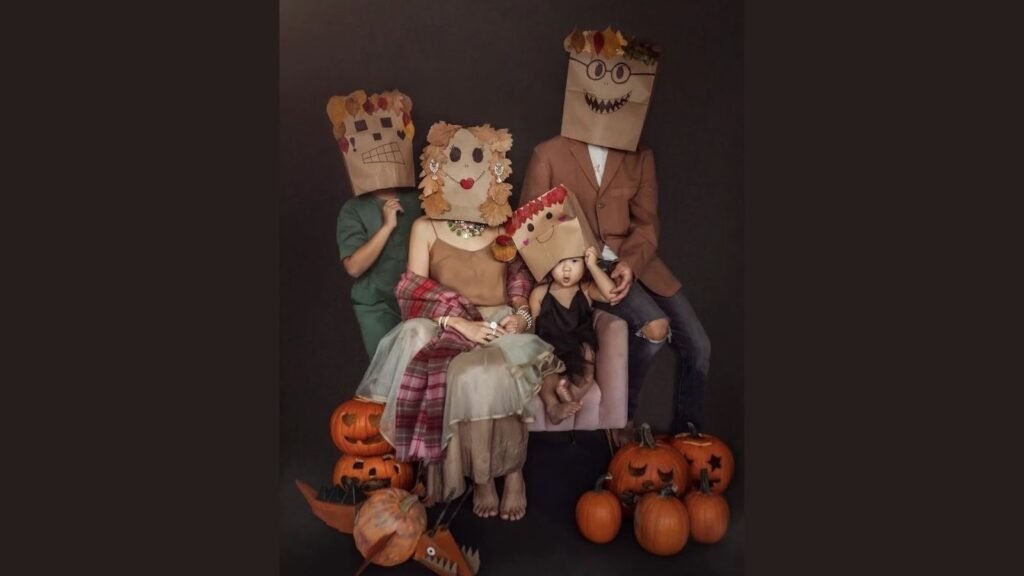
Halloween is often more fun when everyone joins in. Spooky Halloween photography is a great opportunity to bring families together creatively. Encourage parents to dress up too, whether they go all-out or just wear matching colors with the kids.
Some families enjoy doing themed shoots like “The Addams Family,” “Haunted Carnival,” or “Pirates in the Graveyard.” Others keep it simple with cozy autumn sweaters and pumpkin patches. The goal is connection and fun, not perfection.
Try photographing interactions rather than stiff poses a parent helping a child carve a pumpkin, or siblings pretending to scare each other. Those candid moments carry genuine emotion, which makes them timeless.
Composition is what turns a photo from average to amazing. In spooky Halloween photography, depth is your best friend. Use leading lines like fences, paths, or rows of pumpkins to draw the viewer’s eyes toward the subject.
Foreground elements, such as fog, hanging cobwebs, or glowing lanterns, add layers to your shot. You can also frame your subjects naturally by shooting through branches, doorways, or Halloween decorations.
Don’t be afraid to experiment with different angles. Crouch low to make kids look more heroic or mysterious. Shoot from above for a more playful, storybook feel. Photography is about exploring perspectives until you find the one that fits your vision.
Halloween night can get chaotic, and photography sessions can easily get hectic with excited children running around in costumes. Always prioritize safety in spooky Halloween photography.
Avoid shooting near roads or poorly lit areas. Keep cords, lighting gear, and props out of pathways. If using fog machines, ensure good ventilation and check for any allergies or breathing sensitivities.
Also, respect kids’ comfort levels. Not every child enjoys the dark or spooky environments. Keep your tone positive and fun, use friendly words like “mystery” and “magic” instead of “scary” or “haunted.” When children feel safe, their genuine excitement shines through, and that’s what makes your photos special.
Once your photos are ready, you’ll want to share them with friends and family. Social media is a great place to showcase your spooky Halloween photography, but be mindful of privacy and safety, especially when posting images of kids.
Use privacy settings wisely and avoid sharing specific location details. You can also create a private online gallery or digital scrapbook where loved ones can view and download the images securely.
Printing your Halloween photos is another wonderful idea. Create a photo book titled “Our Spooky Halloween Adventures,” or print large canvases for seasonal decor. These keepsakes become family treasures that bring smiles every October.
Even the most beautiful photo can benefit from a bit of professional editing. The difference between a “good” and “great” spooky Halloween photography session often comes down to how the final images are polished.
Editing helps fine-tune brightness, contrast, and tones. It can remove distractions, enhance color balance, and add subtle effects like fog, moonlight, or glowing highlights that make your scene pop. At aitinsider, we specialize in image editing services tailored for photographers, parents, and creative professionals.
Our editing experts can help bring your Halloween shots to life while keeping the natural feel intact. Whether you want to adjust lighting, clean up backgrounds, or enhance costumes and colors,aitInsider ensures your spooky photos look enchanting and professional, perfect for printing, framing, or sharing online.
When working on spooky Halloween photography, there are a few pitfalls to watch out for. Overediting is one of the; adding too many filters or effects can make your images look artificial. Aim for balance; let the natural light and colors of Halloween shine through.
Another common mistake is underexposure. Because Halloween often involves low light, it’s easy to end up with photos that are too dark. Always check your camera’s exposure settings or use a bit of fill light to keep details visible.
Finally, remember that less is more with props. It’s easy to overcrowd a scene with decorations, but simplicity often looks more elegant and eerie. A single glowing pumpkin in the right spot can be far more powerful than a cluttered background.
At its heart, spooky Halloween photography is about creativity, storytelling, and togetherness. It’s a way for families to celebrate imagination, to turn a simple night of costumes and candy into something magical that lasts forever in photos.
By planning, embracing natural light, focusing on safety, and enhancing your shots with thoughtful editing, you can create Halloween photos that feel both haunting and heartwarming.
So grab your camera, dress up the family, and go capture those glowing pumpkins and giggling ghosts. With these tips and a touch of your own creativity, your next spooky Halloween photography session will be something everyone remembers.
And when it’s time to perfect those shots, visit aitinsider for professional image editing services. Whether you want subtle retouching or complete photo enhancement, our team can help make your Halloween images look spellbinding. Because at aitInsider, every photo deserves to shine even in the dark.
Spooky & Sensual Halloween Couple Boudoir Ideas | (2025)
[…] to ghosts. Now imagine blending that energy with the intimacy of a boudoir shoot. That’s where Halloween couple boudoir ideas really […]
Halloween Photoshoot Ideas For Adults | Creative & Fun (New)
[…] In this article from aitinsider, we’ll explore the best 10 creative Halloween photoshoot ideas for adults that you can try this year. You’ll learn how to create unforgettable photos using simple props, lighting tricks, and poses that bring your Halloween spirit to life. So, grab your costume and let’s dive into the spooktacular world of adult Halloween photography! […]
Halloween Poses For Photoshoot | Spooky & Creative Ideas (Updated)
[…] is what makes Halloween photos so special: they’re art, performance, and photography all rolled into […]
Scary Halloween Photoshoot | Spooky & Creative Ideas (2025)
[…] ghosts, ghouls, and pumpkin smiles. But while most people stick to quick costume selfies, a scary Halloween photoshoot lets you create something cinematic and lasting. It’s your chance to push your creativity, […]
Hilarious Funny Halloween Pictures & Costume Ideas (NEW)
[…] share moments that are relatable and lighthearted. While spooky photography can be stunning, funny halloween pictures have an instant emotional pull: they’re entertaining, approachable, and easy to recreate. Whether […]
Spooky & Fun Halloween Party Pictures Ideas 2025 | Aitinsider
[…] costumes, the chaos, and the tiny moments that make the night unforgettable. If you want to create halloween party pictures that actually capture the moment-rather than just documenting it-this guide is for you. I’ll walk […]