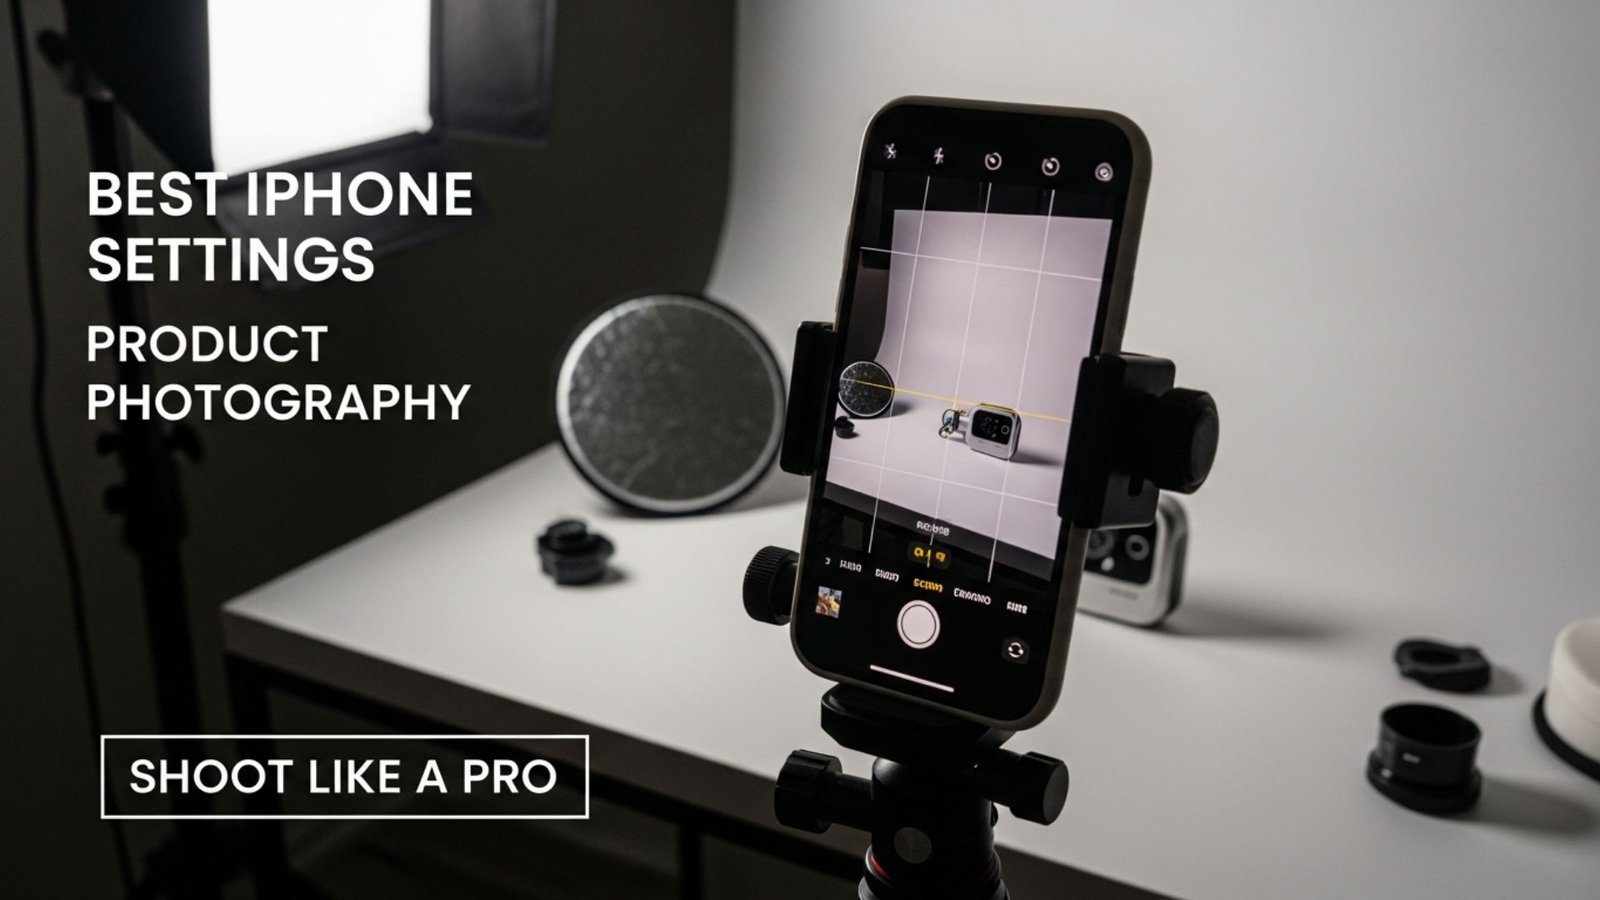
If you are trying to create high-quality product images without investing in expensive cameras or studio setups, you’re in the right place. iPhones have become powerful tools for photographers, and with the right approach, they can deliver professional-looking product photos suitable for e-commerce, social media, or personal branding. Learning the Best iPhone Settings for Product Photography will help you capture crisp, clear, and visually appealing images that sell.
Whether you’re photographing jewelry, electronics, food, apparel, or home goods, the way you set up your iPhone can dramatically change the final result. Many people rely on automatic modes and hope for the best, but even small adjustments in exposure, focus, and lighting can take your photos from ordinary to eye-catching. In this article, we’ll explore these settings in detail, explain why each one matters, and offer practical tips to shoot like a pro.
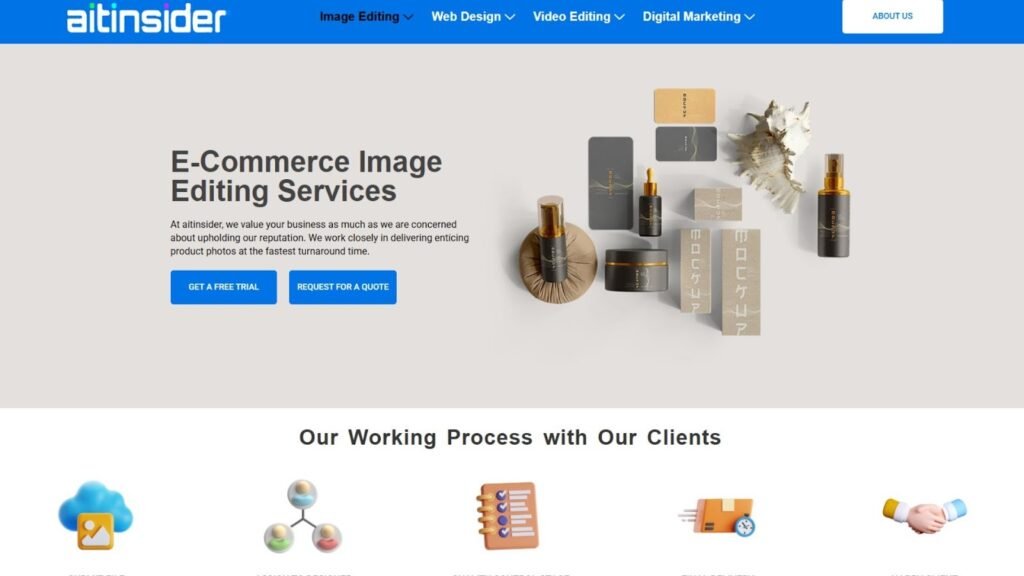
At aitinsider, we understand that great photography starts with capturing the image correctly, but editing is just as important. After learning the Best iPhone Settings for Product Photography, you’ll discover how minor tweaks in post-processing can enhance your images, making them crisp, clean, and marketplace-ready.
Many people underestimate the capabilities of modern smartphones. Recent iPhone models feature advanced cameras, multiple lenses, and software algorithms that rival professional cameras in certain scenarios. What makes the iPhone ideal for product photography is its portability, consistency, and ability to process images intelligently.
Using the Best iPhone Settings for Product Photography allows you to take full advantage of these features. You can control focus, exposure, and color temperature with precision, rather than relying solely on the phone’s automatic adjustments. When combined with proper lighting and a steady hand—or a tripod—you can create images that look professional even without high-end gear.
Furthermore, iPhones allow you to shoot in RAW format, giving you more flexibility in post-processing. RAW files preserve maximum detail and allow color correction, exposure adjustment, and editing without degrading image quality. This is particularly useful for e-commerce sellers, social media marketers, and content creators who want every detail to look perfect.
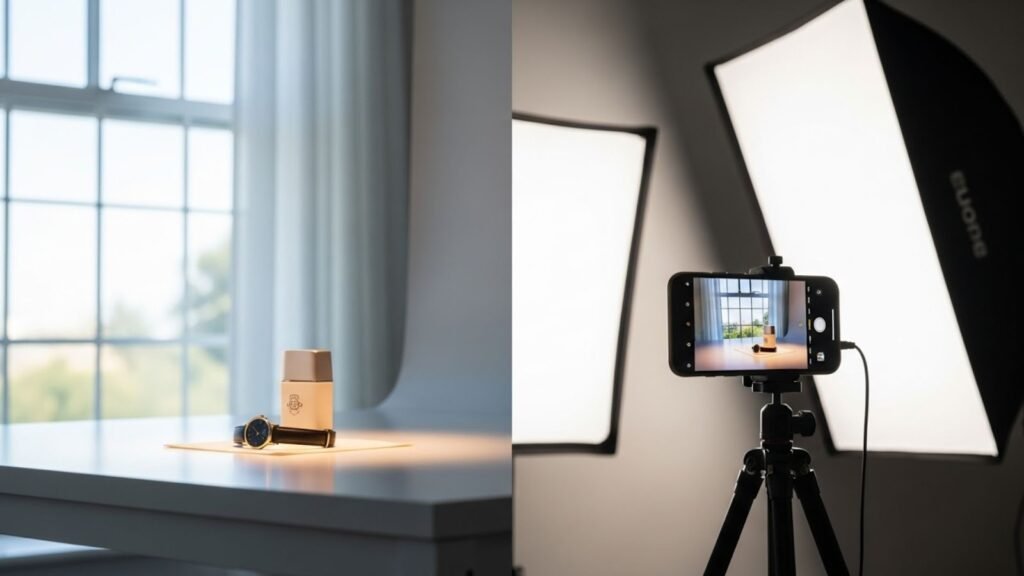
Before diving into camera settings, it’s crucial to understand lighting. No matter how advanced your iPhone is, poor lighting will result in dull, uneven, or distorted product photos. For the Best iPhone Settings for Product Photography, controlling your lighting environment is essential.
Natural light is a great starting point. Shooting near a window with soft, diffused daylight can create clean, flattering light for most products. Avoid direct sunlight, which can cause harsh shadows and overexposure. If natural light isn’t available, consider using LED panels or continuous softbox lights, which provide consistent illumination. Adjusting the light angle to highlight texture and depth enhances the three-dimensional quality of your products.
Color temperature is also important. Modern iPhones adjust automatically, but being mindful of warm or cool light ensures that your images accurately reflect the product. Consistent lighting prevents color casts, maintains visual appeal, and reduces the need for heavy post-processing. Mastering lighting alongside the Best iPhone Settings for Product Photography forms the foundation of professional product photography.
iPhones often feature multiple lenses: wide, ultra-wide, and telephoto. For most product photography, the wide lens is ideal. It captures products without distortion and maintains sharpness across the frame. The telephoto lens can be useful for small items like jewelry or watches, where you want to isolate details without getting too close. Avoid the ultra-wide lens for product photography, as it can distort shapes and edges.
The default photo mode is sufficient for general shots, but for more control, you should use the ProRAW option (available on newer iPhone models). Shooting in ProRAW preserves maximum image quality and allows adjustments for exposure, contrast, and white balance later. This flexibility is critical when aiming for the Best iPhone Settings for Product Photography, especially for commercial or e-commerce use.
Portrait mode can be used for products with depth, like vases or shoes, to create a subtle background blur, but make sure the edges are sharp. Some products may not work well with Portrait mode because the software can misinterpret edges, so always check the preview before finalizing the shot.
Focusing correctly is one of the simplest yet most important steps for achieving professional product photos. iPhones allow you to tap the screen to set the focus point. Lock the focus by holding your finger on the screen until AE/AF Lock appears. This ensures that the camera doesn’t refocus if you slightly move the phone, keeping the product crisp and in sharp detail.
Exposure adjustment is equally important. After tapping to focus, you can slide the sun icon up or down to brighten or darken the image. Avoid overexposure, which washes out product colors, and underexposure, which hides details. For most products, slightly brighter exposure works well to enhance visibility and create a clean look, especially if you plan to remove backgrounds in editing.
For reflective products like glass or metal, adjust exposure carefully to prevent glare. Experiment with minor changes while maintaining accurate colors. Combining precise focus and exposure ensures that every product photo is clear, professional, and market-ready.
iPhones offer a grid overlay in settings, which helps with composition. For product photography, aligning the product along the gridlines or using the rule of thirds can create visually pleasing images. Centered shots work well for catalogs, while slightly off-center shots may be more engaging for lifestyle or creative photography.
Keep backgrounds simple and uncluttered. White or neutral backgrounds work best for most e-commerce listings, but soft-colored backgrounds may be used for lifestyle shots. The goal is to make the product stand out and ensure the viewer’s attention is drawn to the details. Correct composition enhances the Best iPhone Settings for Product Photography by giving the final image a professional and balanced appearance.
Newer iPhone models come with features like HDR, Night Mode, and Smart HDR 4. For product photography, HDR can help balance light in high-contrast situations, ensuring details are visible in both shadows and highlights. Night Mode is rarely necessary unless you’re shooting in very low light, but it can be used creatively for ambient shots.
Live Photos can also be helpful. By capturing multiple frames in one shot, you can choose the sharpest image for your listing. Similarly, using burst mode can help when photographing moving products, like food items or water splashes, to capture the perfect moment.
Even the best iPhone camera cannot compensate for shaky hands. Using a tripod ensures consistent framing, sharp focus, and allows for longer exposures if needed. Tripods are essential when aiming for the Best iPhone Settings for Product Photography, especially for catalog shots or small products.
Hands-free options like a small desktop tripod or clamp allow you to maintain consistent angles, which is important for maintaining a professional and uniform look across all product images. Stability reduces blur, improves sharpness, and makes post-processing much easier.
Once your photos are captured, editing is the next crucial step. Even the best iPhone photos benefit from minor adjustments in exposure, contrast, highlights, shadows, and color correction. RAW images are ideal for this because they allow maximum flexibility without quality loss.
At aitinsider, we provide image editing services for product photos, including background removal, color correction, and shadow enhancement. Professional editing ensures your photos look polished, consistent, and e-commerce-ready, regardless of the lighting or iPhone settings used during the shoot.
White balance plays a critical role in achieving the Best iPhone Settings for Product Photography. Even the iPhone’s automatic settings can sometimes misinterpret lighting conditions, creating slightly warm or cool color casts. For products where color accuracy is essential—like clothing, cosmetics, and electronics—ensuring true-to-life colors is a must.
You can manually adjust white balance using third-party apps like Halide or Lightroom Mobile. These apps allow precise control over temperature and tint, ensuring your product appears exactly as it does in real life. Consistent color not only makes your images look professional but also reduces confusion for buyers and increases trust in your brand.
Even subtle shifts in color can affect perception. For example, a red handbag photographed with a warm cast may appear orange, leading to mismatched expectations. Maintaining accurate white balance is part of the Best iPhone Settings for Product Photography workflow and ensures your product listings convey authenticity.
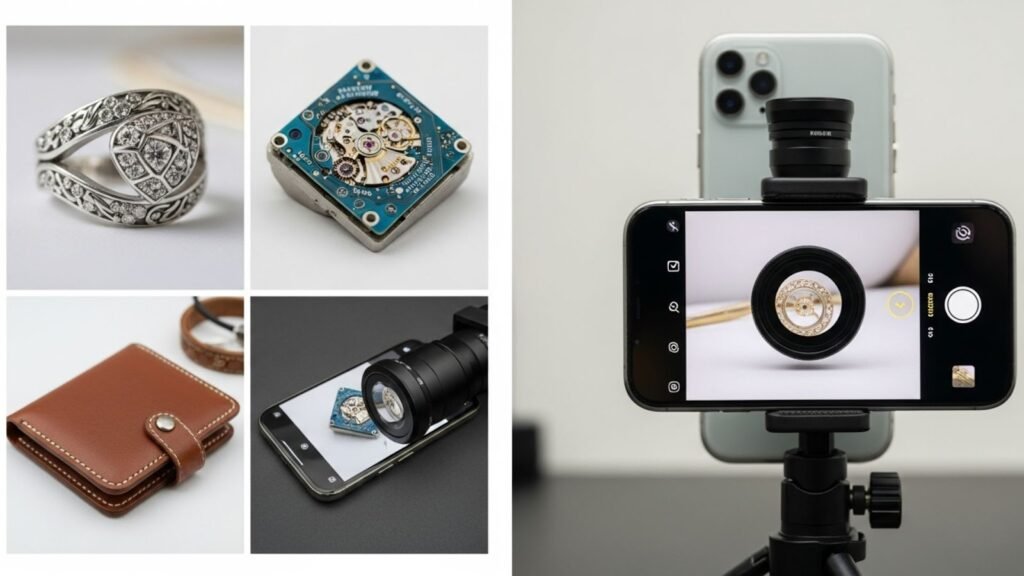
Some products require detailed close-ups to highlight texture, quality, or intricate design. Modern iPhones come with macro or telephoto lenses perfect for this purpose. Shooting in macro mode allows you to capture jewelry, electronics, or small accessories with incredible detail.
When using macro settings, make sure the product is well-lit and stable. Even a slight movement can cause blur at such close distances. Use a tripod or clamp for precision. Adjust focus carefully, tapping the screen to ensure the key area is sharp. Slightly increasing exposure can help highlight small details, but avoid overexposure, which can wash out texture.
Macro photography is particularly valuable for e-commerce listings on Amazon or Shopify because buyers often want to see stitching, engraving, finishes, or other intricate features. Leveraging the Best iPhone Settings for Product Photography for macro shots ensures your products feel premium and professional.
Lighting can make or break your product photography. For iPhone shoots, continuous LED lights, ring lights, or softboxes are highly recommended. Using diffusers prevents harsh shadows, while reflectors can bounce light to highlight details.
For reflective products like glass, metal, or polished surfaces, adjusting light angles is essential to reduce glare. Shooting from a slightly elevated or off-center angle can enhance the product’s appearance and avoid unwanted reflections.
For small items, consider using a light tent or a foldable shooting box. This setup creates even, soft light around the product and eliminates distracting background elements. Combined with the Best iPhone Settings for Product Photography, these lighting hacks help you achieve clean, high-quality images suitable for professional listings.
While your iPhone is powerful on its own, accessories can elevate your product photography game. Tripods ensure stability and sharpness, while clip-on macro lenses expand your creative possibilities. Remote shutter controls prevent shake, allowing precise captures.
Reflectors, diffusers, and small LED panels provide better lighting control, making it easier to achieve consistent results. For lifestyle or creative shots, props like backgrounds, stands, or platforms help highlight the product without distracting from it. Using accessories effectively complements the Best iPhone Settings for Product Photography by giving you more control over composition, lighting, and detail.
Efficiency matters when photographing multiple products or large inventories. Using the Best iPhone Settings for Product Photography, you can streamline your workflow:
Set up your shooting space with consistent lighting and backgrounds.
Pre-adjust exposure, focus, and white balance for all shots.
Use a tripod to maintain framing and stability.
Shoot in RAW to allow for flexible post-processing.
Batch-edit in apps or software to maintain consistency.
A well-planned workflow reduces errors, saves time, and ensures that every product photo meets your quality standards. For sellers on Amazon or Shopify, this efficiency can be the difference between a polished listing and one that looks amateur.
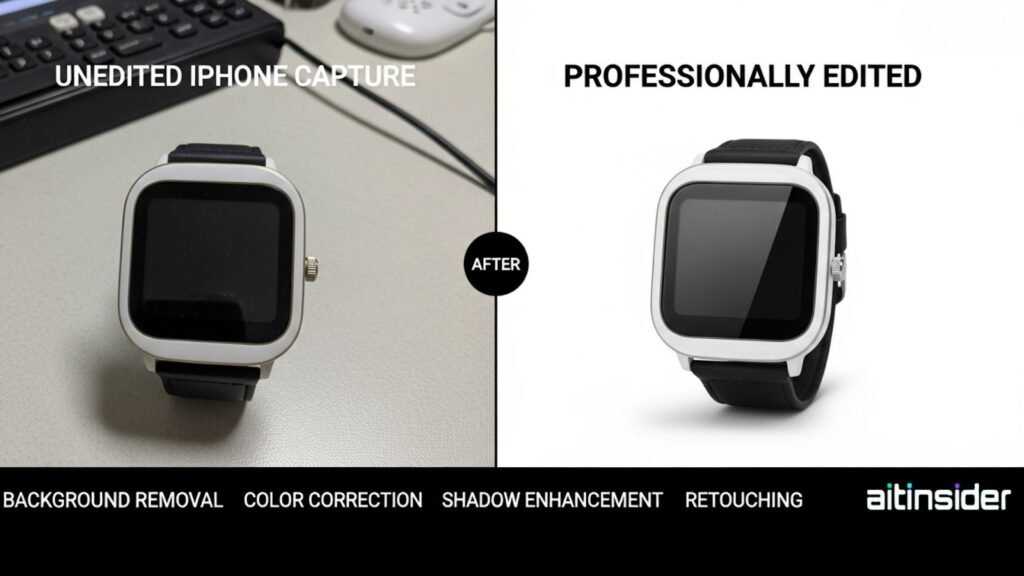
Even the best iPhone captures often benefit from editing. Adjustments in brightness, contrast, highlights, shadows, and sharpness enhance product visibility. For e-commerce listings, background cleanup and color correction are essential.
At aitinsider, we provide professional image editing services tailored for product photos. Our team specializes in background removal, shadow enhancement, color correction, and retouching. Whether you are selling on Amazon, Shopify, or any other platform, professional editing ensures your product images are polished, consistent, and ready to convert viewers into buyers.
Editing also allows you to correct minor color shifts from lighting or white balance, ensuring that the product appears true to life. When combined with the Best iPhone Settings for Product Photography, this workflow creates professional, high-converting images.
Even experienced photographers make mistakes that reduce the quality of iPhone product images. Common errors include:
Relying solely on automatic modes, which may misinterpret lighting.
Ignoring white balance adjustments leads to color shifts.
Using reflective backgrounds or poor lighting setups.
Neglecting focus and exposure results in blurry or washed-out images.
Skipping post-processing, leaving inconsistencies in color or detail.
Avoiding these mistakes is crucial for achieving professional results. Following the Best iPhone Settings for Product Photography, combined with controlled lighting, precise focus, and careful editing, ensures high-quality images every time.
For sellers on Amazon, white backgrounds and consistent, neutral lighting are mandatory. Ensure your product fills most of the frame without cropping essential details. Use multiple angles to show shape, size, and texture.
For Shopify, lifestyle shots are important to tell a brand story, but consistency remains key. Products should still look accurate, even if the background or lighting is slightly warmer for aesthetic purposes. The Best iPhone Settings for Product Photography apply to both catalog and lifestyle images, ensuring accuracy while maintaining visual appeal.
Mastering the Best iPhone Settings for Product Photography enables you to capture professional, high-quality images without the need for expensive equipment. By understanding focus, exposure, lighting, composition, white balance, and editing, you can produce photos that enhance your listings, build trust with customers, and drive sales.
At aitinsider, we provide expert image editing services to complement your photography. Whether it’s background removal, color correction, or professional retouching, we help your product images reach their full potential. Combining your iPhone photography skills with professional editing ensures your listings look polished, consistent, and ready to compete in today’s e-commerce landscape.
With the right settings, lighting, and editing workflow, anyone can shoot like a pro using an iPhone. Start implementing these tips today, and watch your product images transform from ordinary to extraordinary.
Best IPhone For Product Photography – 2026 Buyer’s Guide
[…] multiple lenses, or heavy lighting equipment to get professional results. With the Best iPhone for Product Photography, you can capture products quickly, make adjustments on the fly, and instantly upload images to your […]