Welcome – I’m glad you’re here. If you’re curious about the Best Film for Underwater Photography – Colours, Grain & Exposure Explained, you’re in the right place. This article walks you through practical, easy-to-understand ideas about choosing and using film beneath the waves. I’ll explain how color behaves underwater, what grain means for your pictures, and how exposure choices change your results. Think of this as a friendly chat with a fellow enthusiast – clear, useful, and ready to help you shoot better film underwater.
Even though digital cameras dominate, film has a special charm and quality underwater. Film can deliver unique color rendering, organic grain structure, and a tactile look that many photographers crave. When you search for the Best Film for Underwater Photography – Colours, Grain & Exposure Explained, you’re usually looking for guidance that balances technical control with creative choices. Film requires planning – from film stock selection to metering and scanning – and that planning often leads to thoughtful, beautiful images. The feeling of waiting to see a developed negative is part of the magic.
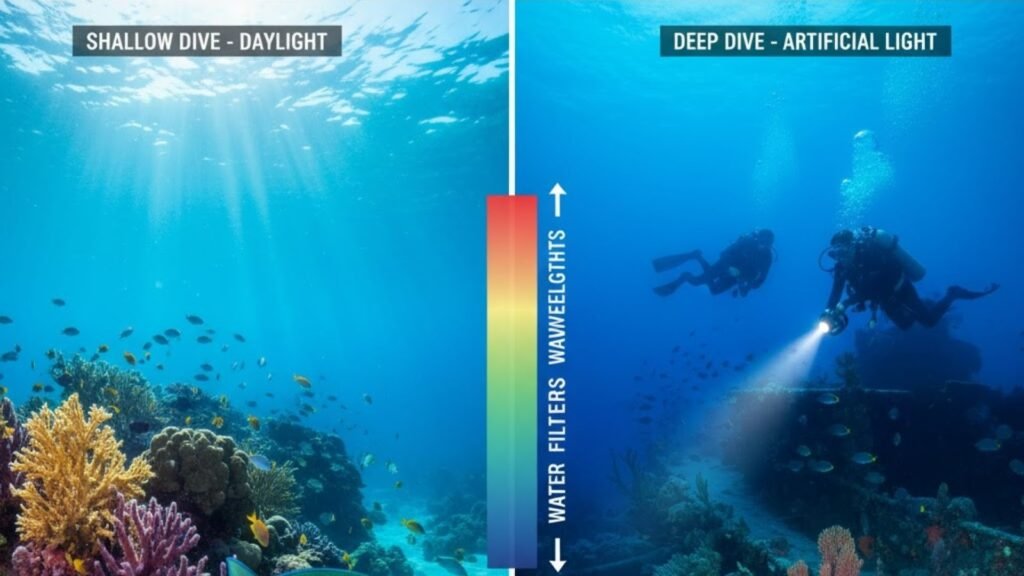
Light behaves differently underwater. As you descend, the water filters out certain wavelengths. Red and orange disappear first, followed by yellow; blues and greens dominate at deeper depths. This shift matters when you choose film: some stocks render colors more faithfully, while others push tones in pleasing or dramatic directions.
When considering the Best Film for Underwater Photography – Colours, Grain & Exposure Explained, think about the typical depth you’ll be shooting at and whether you’ll use artificial light. If you plan to shoot shallow reef scenes in daylight, films with good color saturation and fine grain will reproduce coral and fish vibrantly. For deeper dives where strobe light or video lights are necessary, consider films that respond well to flash and maintain color balance when illuminated.
There are two common approaches to color underwater: try to restore natural color, or embrace the blue-green environment and make it part of the image’s mood. If your goal is accurate color, choose film that scans well and keeps a broad color gamut. If you prefer a stylized look – moody blues, high contrast – then grainier films or stocks known for punchy blues can help establish that aesthetic.
Remember: the Best Film for Underwater Photography – Colours, Grain & Exposure Explained depends on whether you’ll correct color in post (scanning and editing) or want the film itself to produce the final look. A film that handles highlights and mid-tones gracefully gives you more flexibility when scanning.
Grain is the film equivalent of digital noise, but it behaves differently. Grain is part of a film’s character – it can add texture, atmosphere, and a sense of scale. Fine-grain films look smoother and often feel more modern; coarser-grain films can feel nostalgic or cinematic.
If you’re searching for the Best Film for Underwater Photography – Colours, Grain & Exposure Explained, consider how much detail you want in your final prints. For images where you want crisp coral textures or detailed fish scales, fine-grain, slower-speed films are ideal. If you want a cinematic, softer vibe – especially in low-light or moody scenes – higher-speed films with more visible grain can be an artistic advantage.
Exposure underwater follows the same basic rules as on land, but with added complexity due to changing light levels and color absorption. Metering can be tricky because the scene’s dominant blue-green cast may fool the meter. Here are simple exposure approaches that work well when aiming for the Best Film for Underwater Photography – Colours, Grain & Exposure Explained:
Start by metering for the subject, not for the water. If you expose for the bright water around your subject, your main subject may be underexposed. Many underwater photographers recommend using spot or center-weighted metering on your subject, or using incident metering if your housing allows it.
Use a slightly positive exposure compensation when shooting color film without strobes. This helps preserve subtle reds and warm tones that get lost underwater. If you’re using strobes or continuous lights, meter for the light on your subject rather than the ambient water, because the strobe will define color and luminance.
Finally, remember reciprocity. Film reacts differently to long exposures. If you’re in deeper water and resorting to slower shutter speeds, check the film’s reciprocity failure characteristics and compensate exposure accordingly.
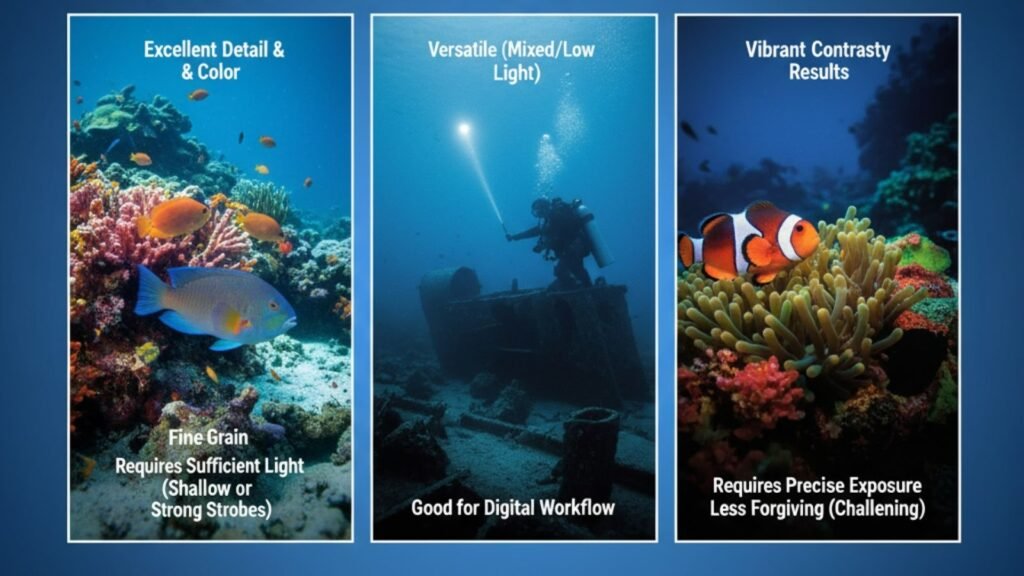
There’s no single “best” film that suits every underwater situation – but a few reliable patterns emerge. Slower, fine-grain color negative films (ISO 100–200) give excellent detail and color if you can maintain sufficient light (shallow water or strong strobes). Faster color negative films (ISO 400+) are versatile for mixed-light conditions and low-light dives, trading a bit more grain for flexibility. Slide films (color reversal) produce vibrant, contrasty results but require precise exposure – a challenge underwater – and are less forgiving than negatives.
When hunting for the Best Film for Underwater Photography – Colours, Grain & Exposure Explained, consider these factors: your typical depth, use of strobes, preferred scanning and color correction workflow, and whether you want fine detail or a vintage look. Many photographers choose a balanced ISO 400 color negative film as their go-to because it handles varied light well and scans into digital workflows smoothly.
Strobes and underwater flash are powerful tools for restoring color and freezing motion. When you use a strobe, it illuminates the scene with close-range light that brings back reds and warms up tones. This changes the exposure equation: ambient blue water becomes background, and your strobe becomes the primary light source for your subject.
If you’re focused on the Best Film for Underwater Photography – Colours, Grain & Exposure Explained, practice balancing ambient light and strobe output. In many cases, it’s helpful to slightly underexpose the ambient light and allow the strobe to render the subject with correct color. That approach isolates the subject from the background and delivers color-rich film negatives that scan cleanly.
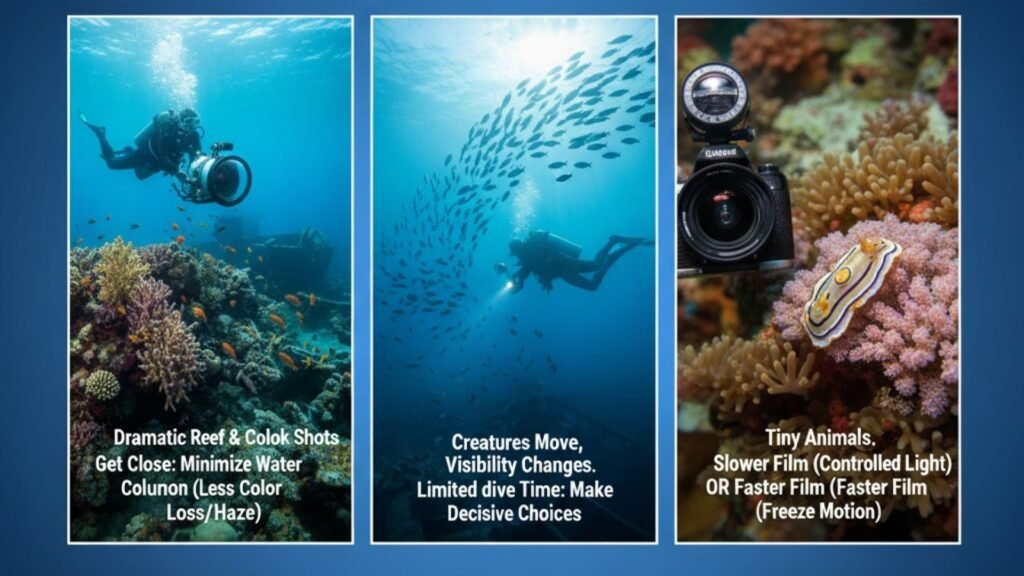
Film demands thoughtful shooting because you can’t instantly review a frame. This encourages discipline – think about composition, anticipate movement, and make decisive choices. For underwater work, this matters more because creatures move, visibility changes, and your dive time is limited.
Use wide-angle lenses for dramatic reef and wreck shots, getting close to your subject to minimize the water column between you and the subject (which reduces color loss and haze). For macro film photography of tiny animals, consider slower films if you have controlled lighting; otherwise, use faster film to let you freeze motion.
Film is only part of the journey; how you develop and scan it matters a lot. Color negative film gives you latitude in development and scanning – it’s easier to correct exposure and color shifts. Slide film offers punchy colors but demands precise processing.
When aiming for the Best Film for Underwater Photography – Colours, Grain & Exposure Explained, choose a lab with good scanning profiles or invest in a quality scanner and learn color correction basics. Scanning can restore lost reds and balance tones if you underexposed slightly. Ask your lab about custom scanning adjustments for underwater work – some labs routinely adjust blue-green bias to bring out natural hues.
Films and cameras must be protected from the elements. Film can fog or get damaged by heat and humidity, so store unshot film in a cool, dry place until you’re ready to go. Use a reliable underwater housing, check O-rings carefully, and rinse your housing with fresh water after dives. When changing film, do it in a dry, shaded area to avoid accidental exposure.
These practical steps support your goal of capturing the Best Film for Underwater Photography – Colours, Grain & Exposure Explained – small precautions can make the difference between a great negative and a ruined roll.
Film is a creative choice. Choose film if you want its look: organic grain, tonal subtleties, and the satisfaction of analog workflow. Film is also great for educational purposes – it forces you to slow down and think. Digital wins for immediacy, extreme low-light performance, and flexibility in post-processing.
If you aim to learn and build a unique portfolio, searching for the Best Film for Underwater Photography – Colours, Grain & Exposure Explained can be an excellent creative exercise. Many photographers shoot both formats and appreciate what each brings to the final image.
Before you descend, run through a short checklist: load the camera in a dry, shaded place; set a conservative ISO and plan exposure compensation; clean your housing and test seals; pack extra film; check strobe batteries and test sync. Being prepared increases your chances of producing a film that fulfills the promise of the Best Film for Underwater Photography – Colours, Grain & Exposure Explained.

Choosing the Best Film for Underwater Photography – Colours, Grain & Exposure Explained is part technical, part aesthetic. It’s about knowing how light behaves under water, how grain adds character, and how exposure choices translate to a developed negative. The real joy comes from experimenting: try different stocks, vary your strobe power, and scan with different correction profiles to see what you like most.
If you’re just getting started, pick a versatile color negative at ISO 400, practice with strobes in shallow water, and learn how your chosen lab scans negatives. From there, explore slower and faster films depending on what you want: crisp detail or grainy mood.
For help with the next steps – like scanning, color correction, or making your underwater shots pop – check our services at aitinsider. We provide Image Editing services that can take your film scans and refine colors, reduce color casts, and bring out texture while keeping the film’s character.
If you enjoyed this guide to the Best Film for Underwater Photography – Colours, Grain & Exposure Explained, share it with fellow photographers and dive buddies. For professional help with color correction or restoration of your underwater film scans, visit aitinsider and explore our Image Editing services. Happy diving and happy shooting – may your next roll be full of color, grain, and perfect exposures.