
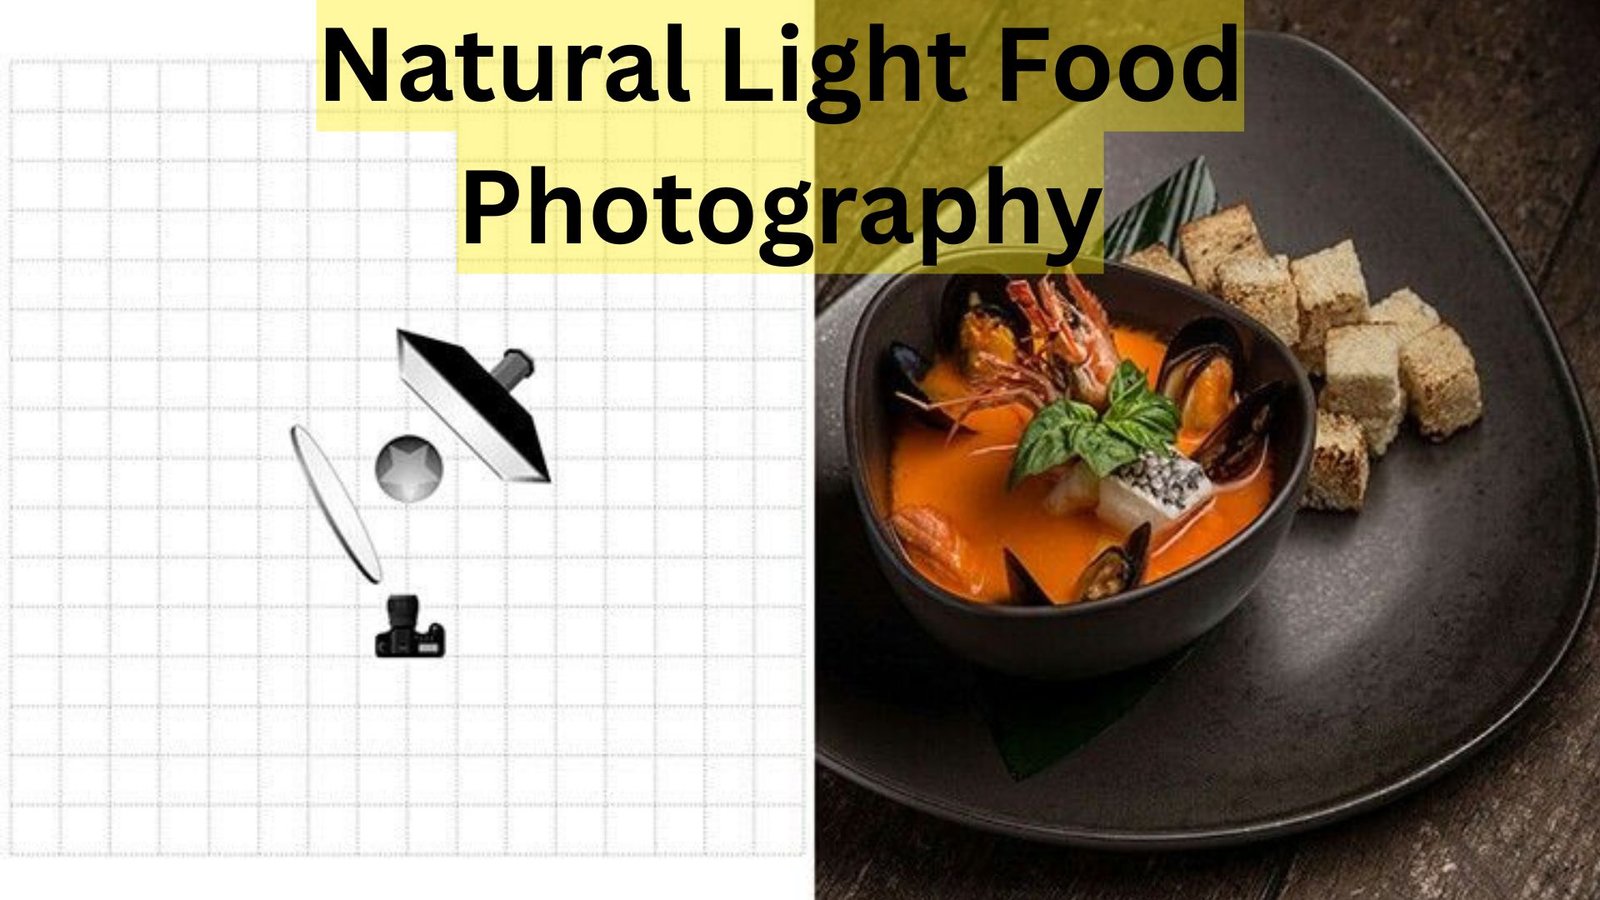
If you’ve ever looked at a plate of food and thought, “Wow, that looks delicious!” chances are, natural light played a big part in that photo. Natural light food photography is one of the most authentic, beautiful, and accessible ways to capture mouthwatering food images. Unlike artificial lighting setups that can feel staged or harsh, natural light brings warmth, softness, and realism to your food shots.
In this detailed guide from aitinsider, we’ll walk you through every step from setting up your scene to the final edit. Whether you’re a beginner food blogger, a small business owner, or simply someone who loves sharing food photos on social media, this article will show you how to master natural light food photography easily and effectively.
Understanding Natural Light Food Photography
Before we dive into setups and edits, let’s understand what natural light food photography really means. It’s simply the art of photographing food using daylight as your main light source flashes, no studio lights, just sunlight. This method is loved by both professionals and hobbyists because it produces soft shadows, warm tones, and true-to-life colors.
Natural light food photography captures the essence of food the way we actually see it. When done right, it makes your audience feel like they could reach out and take a bite. The texture of bread, the shine on a fresh strawberry, or the steam from a hot bowl of soup all look more natural and appetizing under sunlight.
The key is learning how to control that light. Unlike artificial lights, natural light changes throughout the day. It can be strong and directional in the morning or warm and gentle during golden hour. Understanding this dynamic will help you choose the best time and place for your food photos.

Choosing the Right Spot for Natural Light Food Photography
The first step in natural light food photography is finding your light source. You don’t need an expensive studiojust a window with good sunlight. North- or south-facing windows are ideal because they give consistent, soft light throughout the day.
If the sunlight is too harsh, you can diffuse it by hanging a white curtain, a thin sheet, or a piece of parchment paper over the window. This helps soften the light, reduce harsh shadows, and create that dreamy, even look we all love in food photography.
Try placing your setup near the window but not directly in the sunlight. Direct sunlight can blow out highlights and make your food look overly bright or washed out. Instead, let the diffused light fall naturally across your dish, highlighting its textures and details.
Best Times of Day for Shooting
Natural light changes throughout the day, and knowing when to shoot can make or break your photos. Early morning light is soft and cool, great for fresh breakfast setups or bright-colored dishes. Midday light, while stronger, can be diffused with curtains to give consistent brightness. The late afternoon golden hour adds warmth and depthperfect for cozy dinner scenes or rustic dishes.
In natural light food photography, timing is everything. Take a few test shots at different times of the day and notice how the color temperature changes. You’ll soon develop an instinct for when your kitchen or studio gives you the most flattering light.
Setting Up Your Food Scene
Once you’ve found your perfect spot and timing, it’s time to create your scene. Start with your main dish and build your setup around it. You can use simple backgrounds like wooden boards, marble countertops, or even textured fabrics. Keep in mind that in natural light food photography, simplicity often works best.
Arrange your propsplates, cutlery, napkins, or ingredients carefully. They should complement the food without stealing attention. Think of your composition as telling a story. For example, if you’re photographing a cup of coffee, adding a croissant and a newspaper can create a warm, relaxed morning vibe.
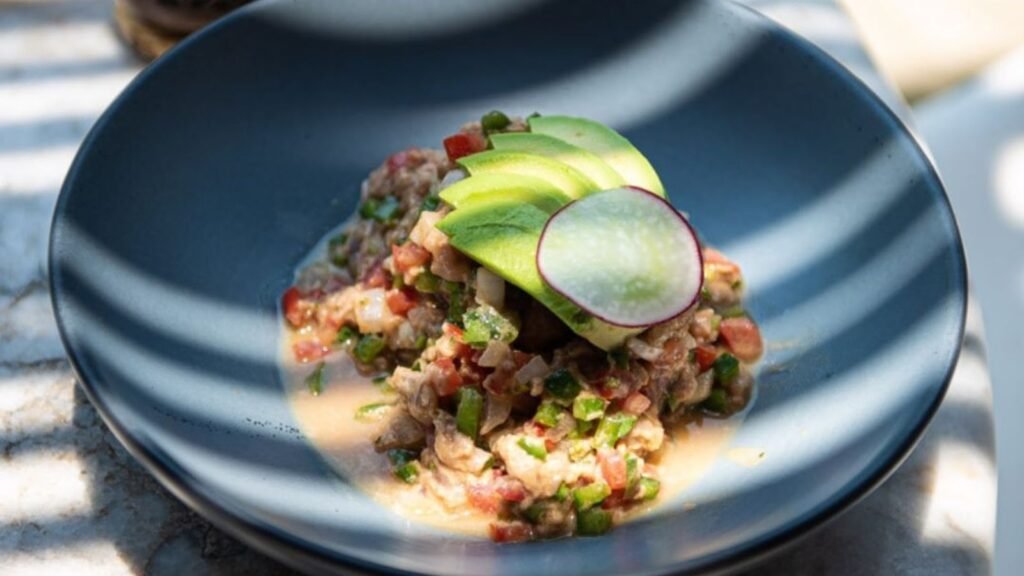
Try experimenting with different anglesoverhead shots (flat lays) work great for colorful dishes like salads or desserts, while 45-degree angles highlight textures and depth. Side lighting can bring out the structure of layered foods like cakes or sandwiches.
Remember, every detail matters. Even a small crumb or drop of sauce can add realism and life to your shot.
Controlling Shadows and Highlights
One of the biggest challenges in natural light food photography is managing shadows and highlights. While shadows add depth and dimension, too much contrast can distract from the food itself.
You can control this by using reflectorssimple white foam boards or even a piece of white cardboard will do. Place it opposite your light source to bounce some light back onto the darker side of your dish. This helps fill in shadows and create balance.
If your image still feels too bright, you can use a blackboard or fabric to absorb some light and create moodier tones. This is known as nthe egative fill technique that adds contrast and drama to your images.
White Balance and Color Accuracy
In natural light food photography, color accuracy is key. You want your tomatoes to look red, not orange or pink. The color of daylight changes based on the time of day and weather conditions. To maintain accurate colors, set your white balance manually or adjust it during post-processing.
If you’re using a DSLR or mirrorless camera, shoot in RAW format. This gives you full control over white balance and exposure in editing. For smartphone photographers, using the manual or “pro” mode, if available, often allows white balance adjustment directly in the camera app.
Shooting with Smartphones and Cameras
You don’t need fancy gear to create beautiful, natural light food photography. Today’s smartphones are powerful enough to capture stunning images when used correctly. Just make sure your lens is clean and that you’re focusing on the main part of your dish.
For DSLR or mirrorless users, a 50mm or 85mm prime lens works beautifully for food shots because of its ability to produce a shallow depth of field. Use an aperture between f/2.8 and f/5.6 for that soft, blurred background that keeps attention on the food.
Regardless of your device, stability is crucial. Use a tripod or rest your camera on a steady surface to prevent blur, especially when shooting in lower light conditions.
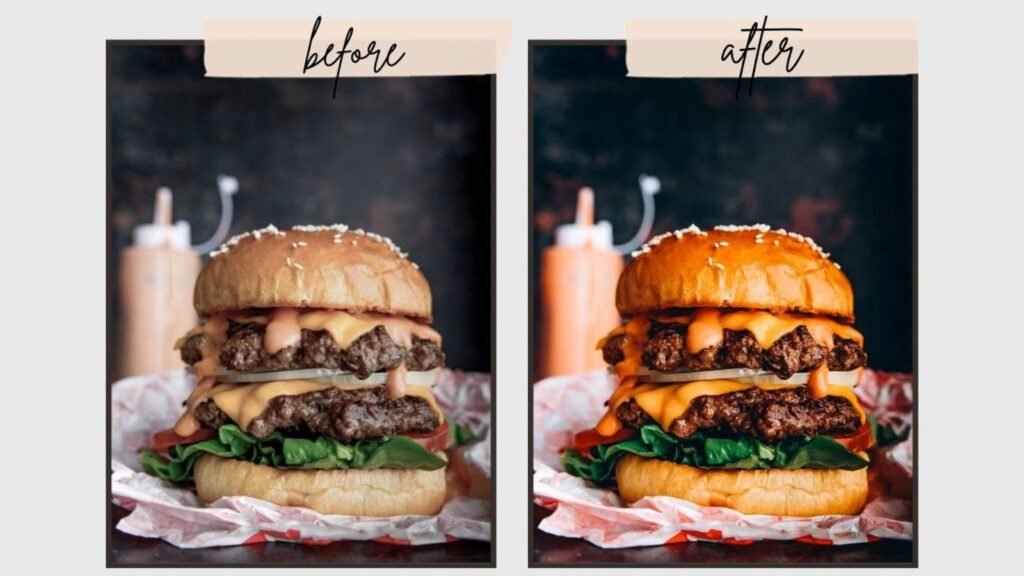
Editing Your Photos: Bringing Out the Best in Natural Light
Editing is where your photos truly come to life. Even in natural light food photography, post-processing is essential for refining your image. You’re not trying to change the look, but to completely enhance what’s already there.
Start with basic adjustments like exposure, contrast, and white balance. Slightly increase clarity and sharpness to bring out textures, especially in items like pastries or grilled food. Adjust shadows and highlights carefully to maintain a balanced, realistic tone.
You can use software like Adobe Lightroom, Capture One, or even mobile apps like Snapseed and Lightroom Mobile. If you’re editing for social media, keep in mind how your images will look on different screens. Aim for a natural look that reflects the true beauty of the food.
The Power of Composition in Natural Light Food Photography
Good composition guides the viewer’s eye and tells a story. The rule of thirds is a classic guideline, imagine dividing your frame into nine equal parts and placing your subject along those lines or intersections. This creates a balanced and visually appealing shot.
Leading lines, curves, and negative space also help draw attention to your food. In natural light food photography, light itself becomes a compositional tool. Use the direction of light to guide the eye toward the focal point of your dish.
Don’t be afraid to break the rules once you understand them. Some of the most compelling food photos are those that use unconventional angles or bold shadows.
Consistency and Style Development
As you practice natural light food photography, you’ll start developing your own style. Maybe you prefer bright, airy breakfast scenes or dark, moody dinner shots. Consistency in lighting, editing, and styling builds your visual identity, something your audience will instantly recognize.
Try keeping a visual journal or Lightroom presets that help maintain a cohesive look across your portfolio or Instagram feed.
Remember, your photos should reflect how the food feels, not just how it looks.
Advanced Editing Techniques for Natural Light Food Photography
Once you’ve mastered your shooting setup, the next step in natural light food photography is fine-tuning your images through careful editing. Editing isn’t about transforming your food into something unrealistic’s about highlighting the best qualities that natural light has already given you.
Start by importing your RAW files into Adobe Lightroom or Capture One. These programs let you adjust exposure, highlights, shadows, and white balance with great precision. If you’re shooting on your phone, use Lightroom Mobile, VSCO, or Snapseed, which provide similar control.
Begin with the basicscorrect your exposure if the image feels too bright or dark. Then, enhance contrast slightly to make your colors pop. Food looks most appetizing when the tones are rich but not overly saturated. Pay close attention to white balance; if your image looks too cool or warm, adjust the temperature slider until it feels natural.
In natural light food photography, texture and clarity matter. Increasing sharpness helps accentuate the crispy edges of toast or the glossy glaze on a cake. Be careful not to overdo it, as excessive sharpening can make your image look artificial.
For an added professional touch, use selective editing tools. Brighten only the areas where you want the viewer’s attention like the center of your dish and slightly darken the background to create depth. This technique, known as vignetting, helps guide the eye naturally to your food.
Storytelling Through Food Photography
Food photography isn’t just about showing what’s on the plate’s about telling a story. Natural light food photography is perfect for storytelling because it feels real, relatable, and full of emotion.
Think about what you want your audience to feel when they see your photo. Is it the warmth of a Sunday breakfast? The coziness of homemade soup on a rainy day? Or the excitement of a colorful fruit platter at a summer picnic? Your lighting, props, and composition should all work together to express that mood.
For example, to tell a cozy story, use warm afternoon light streaming through a window, soft fabrics, and rustic props. For a fresh and energetic mood, shoot near a bright window with white backgrounds and colorful ingredients.
The beauty of natural light food photography lies in its ability to adapt. You can easily change the atmosphere of your shot by adjusting your shooting time, background, and angle. Remember, your goal is to make the viewer feel something. Natural light helps you achieve that effortlessly.
Common Challenges in Natural Light Food Photography
Even though natural light is beautiful, it can be unpredictable. Here are some common challenges photographers face and how to solve them:
1. Changing Light Conditions
Clouds moving in and out can cause inconsistent lighting. To solve this, shoot quickly during consistent lighting, or use a reflector to balance light when the sun shifts.
2. Harsh Shadows and Highlights
If you’re dealing with direct sunlight, diffuse it with a sheer curtain or a white cloth. You can also move your setup slightly away from the window for softer lighting.
3. Limited Shooting Time
If you can’t always shoot during daylight hours, plan your sessions around your window’s best light period. Morning or late afternoon are usually ideal times.
4. Color Casts from Surroundings
Walls, curtains, or colored surfaces can reflect unwanted tints onto your food. Use white foam boards around your setup to neutralize color reflections.
5. Low Light on Cloudy Days
On darker days, increase your ISO slightly or use a tripod to allow for longer exposures without camera shake. The soft, even light from overcast skies can actually be great for moody shots!
Creating a Workflow for Natural Light Food Photography
Having a consistent workflow helps you stay organized and efficient. Here’s a simple routine you can follow each time you shoot:
First, plan your concept. Know what dish you’ll photograph, what props you’ll use, and what story you want to tell. Then, set up your background, test your lighting, and take a few sample shots before plating the food.
Once your dish is ready, shoot from multiple angles overhead, side, and close-up have a variety of choices. After shooting, import your photos and sort through them to pick your best shots.
Finally, edit your chosen images following the steps we discussed earlier. Focus on enhancing the natural tones, maintaining consistency, and ensuring your images look cohesive across your portfolio or website.
When you follow this workflow regularly, you’ll find your sessions becoming smoother, faster, and more creative.
Building a Natural Light Photography Setup at Home
You don’t need a professional studio for stunning results. You can build an effective setup right at home using affordable tools.
Start with a large table or flat surface near a window. Use neutral backgrounds like white or wooden boards to complement your food. Collect props that match your stylesimple plates, napkins, utensils, and natural elements like herbs or linens.
Keep a few reflectors on hand. You can buy professional ones or make your own with foam boards covered in aluminum foil or white paper. A tripod is a great investment for stability, especially when you’re shooting in lower light.
With this simple home setup, you can capture professional-quality images that make your food stand out.
Posting and Sharing Your Natural Light Food Photography
Once you’ve captured and edited your beautiful images, it’s time to share them. Whether you’re posting on Instagram, a food blog, or your business website, presentation is key.
Use captions that describe not just what the dish is, but how it makes people feel. Pairing your photos with engaging stories or recipes helps your audience connect emotionally.
If you’re running a food business, consistent visual branding is essential. Natural light food photography gives your brand an authentic, high-quality look that stands out in today’s digital world.
When posting online, always optimize your images for web users. Resize them without losing quality so your pages load fast. And if you want perfectly polished photos ready for publishing, consider using a professional image editing service like aitinsider.

Professional Editing Support from aitinsider
While natural light creates beautiful, realistic results, sometimes your images need a final touch to look truly professional. That’s where aitinsider comes in.
At aitinsider, we specialize in image editing services for photographers, brands, and content creators. Whether you’re working on food photography, product images, or lifestyle shots, our expert team can enhance lighting, color, and texture while keeping your photo’s natural feel intact.
We provide services like background cleanup, color correction, retouching, shadow enhancement, and overall tone adjustment. These subtle refinements can take your natural light food photography from good to exceptional.
If you’re planning to showcase your work online, print it for a magazine, or use it in restaurant menus, professional editing ensures your photos look consistent and polished across all platforms. You can explore our services directly at aitinsider. where we make every image stand out.
Final Thoughts on Natural Light Food Photography
Natural light food photography is more than just a technique’s an art that celebrates simplicity and truth. When you capture food using daylight, you’re showing it as it really is: vibrant, fresh, and full of life.
From setting up your space and understanding your light source to editing your photos and telling your story, every step adds to your growth as a photographer. The more you practice, the more you’ll develop your own unique style and voice.
Remember, there’s no single “perfect” way to shoot food. Some photographers prefer bright, airy looks; others love moody, dramatic lighting. The key is to experiment, learn from your mistakes, and enjoy the creative process.
Natural light food photography teaches patience, observation, and appreciation for the little details. And with tools like reflectors, editing apps, and professional services such as aitinsider, you can elevate your photos to a professional standard without losing that natural beauty that makes them special.
So next time you set your dish by the window, take a deep breath, study the light, and click that shutter with confidence, you’re capturing not just food, but a story illuminated by nature itself.
Commercial Food Photography – Make Your Dishes Stand Out
[…] paying customer. This guide will walk you through everything a business needs to master Commercial Food Photography – from planning a shoot to editing the final image. I’ll keep things simple and friendly, […]
Creative Food Photography Ideas & Styling Tips 2025
[…] reassuring truth: you don’t need the most expensive gear to make creative food photography that sings. Smartphones today have incredibly capable cameras and can produce gorgeous results in […]