
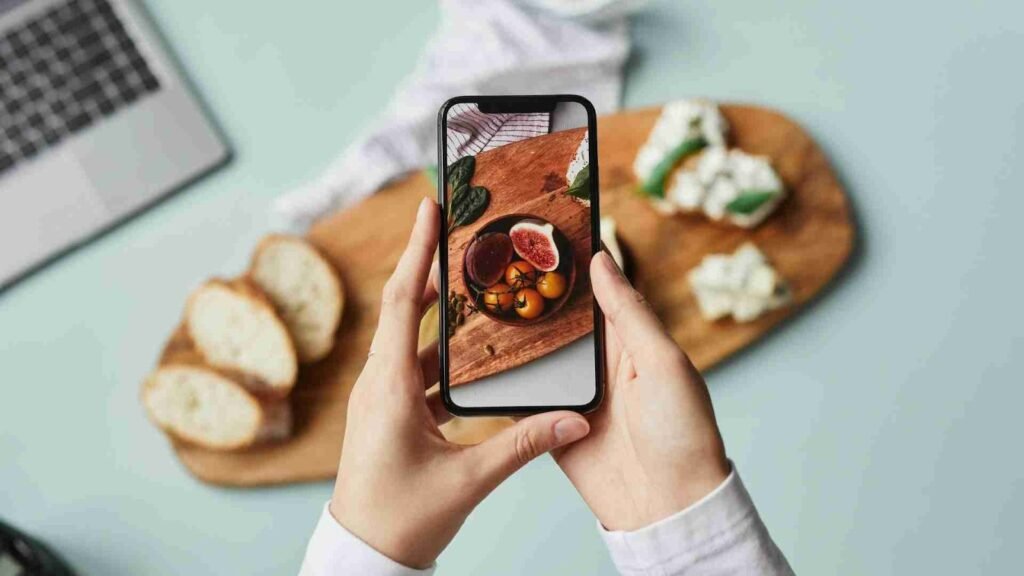
If you’ve ever scrolled through social media and stopped at a photo of a perfectly plated dish, chances are you’ve been captivated by still life food photography. This genre of photography transforms ordinary meals into visually stunning art that can make viewers almost taste the food through the screen. Still life food photography is more than just snapping a picture of your lunch-it’s about creating an atmosphere, capturing textures, colors, and lighting in a way that tells a story. For beginners, it might seem overwhelming at first, but with some guidance, you can start creating eye-catching shots that draw attention, whether for personal enjoyment or commercial purposes.
Understanding Still Life Food Photography
Still life food photography is all about careful composition and attention to detail. Unlike candid or action food photography, where you capture movement or spontaneous moments, still life food photography is about setting the scene. Every element in the frame-from the plate and utensils to the background and props-contributes to the overall mood. Beginners often make the mistake of focusing solely on the food itself, but in still life photography, the supporting elements are just as important. Lighting, texture, and color harmony play a key role in elevating a simple dish into a professional-looking photo.
One of the key aspects of still life food photography is lighting. Natural light is often preferred because it produces soft, flattering shadows and brings out the natural colors of the food. Position your dish near a window with indirect sunlight, or use a diffuser to soften harsh light. For those shooting indoors without access to natural light, artificial lighting setups, like softbox lights, can also produce excellent results. The goal is to highlight the textures and colors of the food without creating harsh shadows or blown-out highlights.

Choosing the Right Equipment
You don’t need an expensive camera to start with still life food photography, but having the right tools can make the process smoother. A DSLR or mirrorless camera with a macro lens is ideal for capturing fine details like the glistening of a sauce or the flaky texture of a pastry. However, even smartphones today have advanced cameras that can produce professional-quality shots if used correctly. Tripods are also essential, especially for longer exposures in low-light conditions, as they prevent camera shake and ensure sharp images.
Props and backgrounds are another essential part of still life food photography. Plates, bowls, utensils, napkins, and cutting boards all contribute to the story your photo tells. Neutral backgrounds like wood, marble, or textured fabrics can help the food stand out without distracting from the main subject. Beginners should start simple-choose one or two props that complement the food, and gradually experiment with more elaborate setups as your skills improve. Color theory is also crucial: contrasting colors between the food and background can make your dishes pop, while harmonious tones create a more subtle, cozy feel.
Mastering Composition in Still Life Food Photography
Composition is what transforms a simple snapshot into a visually compelling image. Beginners often overlook this, focusing solely on the food rather than the overall arrangement. A good composition considers the placement of every element in the frame. The classic rule of thirds can be helpful: imagine dividing your frame into nine equal sections and place the main subject along these lines or their intersections. This creates balance and draws the viewer’s eye naturally to the food.
Negative space is another important concept in still life food photography. Leaving empty space around your subject can help highlight the dish and prevent the photo from feeling crowded. It also gives your image a clean, modern aesthetic, which is especially useful in commercial photography where you might want to add text or logos later. Angles are equally important-overhead shots are great for flat-lay compositions, while side angles can showcase height and layers, like stacked pancakes or a layered cake. Experimenting with different perspectives will help you discover which angle best represents your dish.
Styling Your Food for Captivating Shots
Food styling is an art in itself and is integral to still life food photography. The goal is to make the food look as appetizing as possible while maintaining a natural appearance. For beginners, it’s helpful to start with simple techniques, such as wiping the edges of plates to remove smudges or adding a few garnishes to enhance color and texture. Fresh herbs, sauces, and even a drizzle of oil can add a sense of freshness and movement to your shots.
Consistency is key if you plan to create a series of images for a blog, menu, or social media feed. Using a consistent color palette, props, and lighting style helps establish a recognizable visual identity. However, it’s important not to overdo it-too many props or overly complex styling can distract from the food itself. Remember, the star of still life food photography is the dish. Everything else should complement and enhance it, not overshadow it.
Post-Processing and Editing
Once you’ve captured your shots, editing is where your images truly come to life. Post-processing allows you to enhance colors, adjust lighting, and correct minor imperfections. For beginners, apps like Adobe Lightroom or Photoshop provide powerful yet intuitive tools to refine your photos. You can adjust exposure, contrast, and saturation to make the food look more appetizing, or crop your images for better composition.
Many commercial photographers outsource post-processing to professional services to save time and achieve consistent results. If you’re looking for reliable editing, aitinsider provides expert image editing services that can enhance your still life food photography, ensuring your images are polished and ready for commercial use. Editing can make a significant difference in how your audience perceives the food, and professional touch-ups can elevate your photos to a level suitable for marketing, menus, or online stores.
Lighting Techniques for Stunning Still Life Food Photography
Lighting is the backbone of still life food photography. It sets the mood, highlights textures, and brings out the natural colors of the dish. For beginners, natural light is the easiest and most effective option. Placing your setup near a window with soft, diffused light can create beautiful, flattering shadows. If the sunlight is too harsh, using a sheer curtain or a diffuser will soften the light and prevent unwanted glare. Positioning the light at different angles-side lighting, backlighting, or even a slight overhead angle-can dramatically change the appearance of your food.
Side lighting, for example, is excellent for showing texture. The shadows it creates emphasize the surface of bread, pastries, or grilled vegetables, giving them depth and dimension. Backlighting, on the other hand, creates a glow around liquids or translucent ingredients like fruit slices, enhancing their freshness. Overhead lighting is often used for flat-lay compositions, giving an even, natural look without dramatic shadows. As you experiment, you’ll learn which lighting setup works best for your style and the type of food you’re photographing.
Artificial lighting is another option, especially when natural light is inconsistent or unavailable. Softboxes and LED panels are popular choices because they allow you to control the intensity and direction of the light. Reflectors can also be used to bounce light back onto the subject, reducing harsh shadows and creating a more balanced exposure. Investing time in learning lighting techniques will pay off, as good lighting is often the difference between an amateur snapshot and a professional still life food photograph.
Shooting Styles in Still Life Food Photography
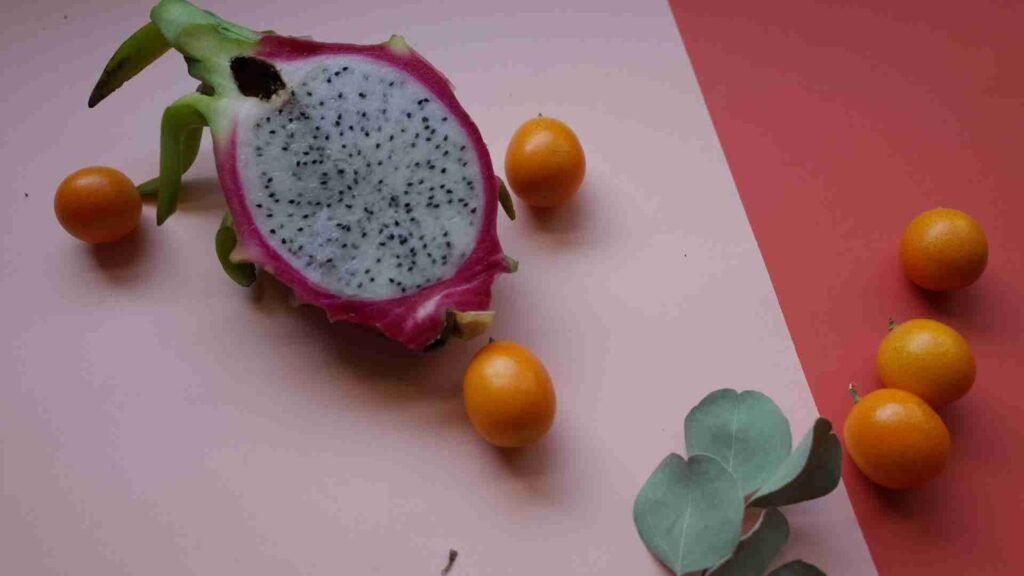
Still life food photography offers a variety of styles to explore. Flat-lay photography is one of the most popular for social media and blogs. In this style, the camera is positioned directly above the scene, capturing everything from the top down. Flat-lays are great for showing multiple elements at once, such as ingredients, plates, and props, giving the viewer a complete view of your setup. This style works especially well for dishes that are visually rich and colorful.
Another style is the close-up or macro shot, which focuses on details and textures. These images capture the glistening of a sauce, the crumb of freshly baked bread, or the delicate layers of a dessert. Macro shots are particularly effective for commercial purposes, as they make the food look irresistible and convey quality. Side-angle shots, meanwhile, are excellent for height and depth, making items like cakes, burgers, or stacked sandwiches appear more dynamic. Beginners should experiment with all these styles to see which best suits their food and personal style.
Telling a Story Through Your Photos
Still life food photography is more than just a visual record of a dish-it’s about telling a story. Every element in the frame contributes to that narrative. For instance, a rustic wooden table, a few scattered ingredients, and a steaming mug of coffee can evoke a cozy, homely feeling. Alternatively, a sleek marble background, minimalist plates, and neatly arranged utensils can convey sophistication and elegance. By carefully selecting props, backgrounds, and even the choice of food, you can communicate a mood or brand identity.
Consider the purpose of your photo when planning the story. For commercial projects, like menu photography or social media marketing, the story should align with the brand image. If you’re photographing for a bakery, highlighting fresh pastries with warm, inviting lighting can entice customers. For a high-end restaurant, focusing on meticulous plating and sophisticated backgrounds communicates quality and exclusivity. Remember, viewers often “taste” the food with their eyes first, so crafting a compelling visual story is essential in still life food photography.
Advanced Tips for Beginners
Once you’re comfortable with the basics, a few advanced tips can help elevate your still life food photography. One technique is using motion, such as sprinkling powdered sugar or drizzling sauce, which adds a dynamic element to otherwise static scenes. Another is experimenting with reflections using mirrors or glossy surfaces, which can create interesting visual effects and enhance textures. Playing with depth of field-blurring the background while keeping the subject sharp-can also draw attention to the main dish and create a professional look.
Paying attention to small details can make a huge difference. Check for crumbs, smudges, or unwanted reflections before shooting. Even tiny adjustments in the placement of utensils, napkins, or garnishes can transform a good photo into a great one. For commercial use, consistency is crucial: if you’re creating a series of images for a menu, website, or social media, maintaining consistent lighting, color tones, and styling will help build a cohesive and professional visual identity.
Commercial Applications of Still Life Food Photography
Still life food photography isn’t just a creative hobby-it has significant commercial potential. Restaurants, cafes, food bloggers, and e-commerce businesses all rely on high-quality food photography to attract customers and drive sales. A visually appealing dish can make a menu item irresistible, increase engagement on social media, or boost the attractiveness of products in online stores. Professional still life food photography can also enhance marketing campaigns, advertisements, and packaging design, giving brands a competitive edge.
Many businesses outsource the post-processing of their food images to achieve a polished and consistent look. This is where services like aitinsider come in. By providing expert image editing, we help bring your still life food photography to the next level, ensuring that your images are not only visually captivating but also ready for commercial use. From color correction to background enhancement, professional editing ensures that your food looks irresistible and consistent across all marketing platforms.
A Beginner-Friendly Workflow for Still Life Food Photography
Creating captivating still life food photography doesn’t have to be complicated. Following a structured workflow can help beginners consistently produce professional-looking images. Start by planning your shot: decide on the dish, props, background, and overall mood. Sketching a rough layout or taking reference photos can save time and reduce trial-and-error during the shoot. Next, set up your lighting, whether natural or artificial, and position your dish and props according to your planned composition. Take multiple test shots to adjust angles, lighting, and placement before capturing the final images.
When shooting, pay attention to small details like crumbs, reflections, or uneven garnishes. These tiny imperfections can distract the viewer and reduce the quality of your photo. For commercial purposes, consistency is key. If you are creating a series of images for a menu or online store, try to maintain uniform lighting, styling, and color balance across all shots. This approach not only enhances the professionalism of your work but also builds a recognizable visual identity that clients or customers will trust.
Common Mistakes to Avoid
Even experienced photographers make mistakes, and beginners are no exception. One common issue in still life food photography is poor lighting. Too harsh or uneven light can flatten the food or create unappealing shadows. Over-styling is another frequent problem-adding too many props or colors can distract from the main subject. Similarly, neglecting composition or angles can make even the most delicious food look unappetizing.
Another mistake is overlooking post-processing. Many beginners assume that the camera alone will produce perfect images. While a good shot is essential, editing is crucial for fine-tuning color, exposure, and sharpness. Additionally, beginners sometimes underestimate the importance of storytelling. Even technically perfect photos can feel lifeless if they lack a mood or narrative. Paying attention to these details will help you avoid common pitfalls and elevate your still life food photography.
Tips for Growing Your Skills
The key to mastering still life food photography is practice and experimentation. Try photographing different types of food, experimenting with lighting setups, props, and backgrounds. Take note of what works well and what doesn’t. Engaging with online photography communities, attending workshops, and studying the work of professional food photographers can also provide inspiration and insight.
Another tip is to practice editing regularly. Learning how to enhance colors, adjust lighting, and correct imperfections will dramatically improve the quality of your photos. If time or technical skill is limited, professional editing services can be a great help. aitinsider specializes in image editing for still life food photography, offering services like color correction, background cleanup, and retouching to ensure your photos look polished and ready for commercial use. By combining strong shooting techniques with professional editing, even beginners can create images that compete at a high level.
Conclusion
Still life food photography is an exciting and rewarding field that allows you to turn ordinary meals into visually stunning art. By understanding lighting, composition, styling, and post-processing, beginners can start creating captivating images that attract attention and engage viewers. Whether you’re photographing for personal enjoyment, social media, or commercial projects, mastering these techniques will help you elevate your work and stand out in the competitive world of food photography.
For anyone serious about taking their still life food photography to the next level, professional editing is a game-changer. aitinsider provides expert image editing services tailored to food photography, ensuring your shots are polished, visually appealing, and ready for commercial use. With the right approach, tools, and support, you can create mouthwatering images that leave a lasting impression and help your brand or personal portfolio shine.